Drones, Denoising and Blender. Stock video with DJI Mini 2
This post is about improving video quality of videos taken with DJI Mini 2. The shot in Ferrol - Doniños is a good example as it has reflections, hard shadows and high lights. Here we are exploring the capabilities of Blender to correct footages in general and then, we are exploring some of the denoising algorithms available at ffmpeg library. Moreover, here is show a simple workflow with simple chunks to make the process as fast as possible. Content:- 1. Selecting and Editing the Footage
- 2. Enhancing Visual Appeal with Color Corrections and exporting
- 3. Exporting Footage Using FFmpeg
- 4. Conclusion
Drones have revolutionized the way we capture visuals, allowing us to explore breathtaking landscapes from a unique perspective. For those in the creative industry, drone footage has become a valuable asset, especially in the world of stock videos. However, to make the most of this resource, it is crucial to transform raw drone footage into captivating content that leaves a lasting impression on the audience. In this blog post, we will delve into the process of editing drone videos for stock platforms like Shutterstock, leveraging Blender and FFmpeg to achieve stunning results.
1. Selecting and Editing the Footage
The first step in creating compelling stock footage is carefully curating and editing the raw drone footage. By meticulously selecting specific segments that make sense and have the potential to tell a captivating story, you set the foundation for an engaging video. Utilizing Blender’s powerful capabilities.
My working process tends to be as simple as paralelizable as possible, so I can make efforts in other things that make much more value.
Speaking about process, the first thing is to detect from a strip, which elements can be valuable as single shoots, because this is a must have if you are willing to sell your footages in shutterstock for example. You should have always this in mind:
- Resolution: Higher resolution videos generally command higher prices. Full HD (1080p) and 4K resolution videos are usually more valuable compared to lower resolutions.
- Quality: The overall quality of the video is crucial. Clear, well-composed shots with minimal noise and artifacts tend to have higher value.
- Content: The subject matter of the video is essential. Footage that is in demand, unique, or has commercial appeal is likely to be priced higher.
- Length: The duration of the video can influence its value. Longer, high-quality footage may have higher value compared to short clips. The good clips use to be between 5 and 30 seconds.
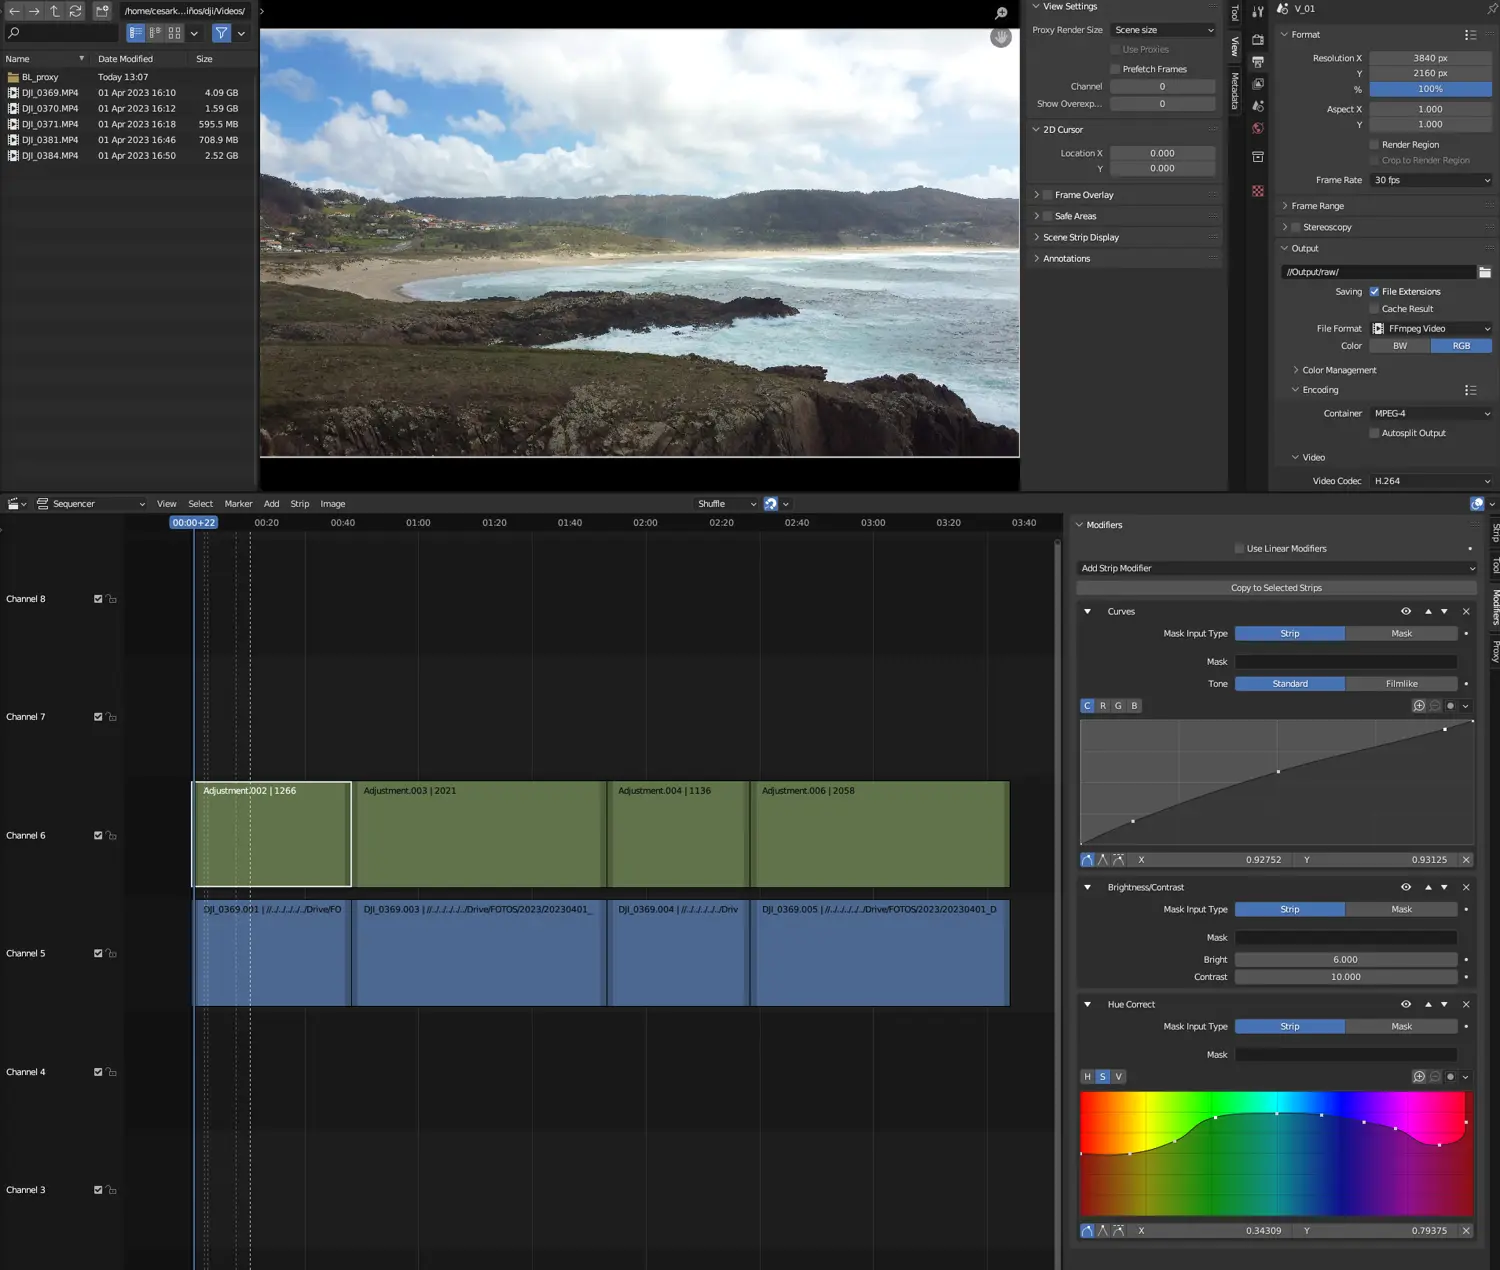
In this example, out of a single shots I found 4 footages with sense by they own. What I do in VSE (Video Sequencer Editor in Blender) is simple:
kto cut- delete the unwanted strips
- put them all followed along. Just go to frame 1 and push
backspace.

2. Enhancing Visual Appeal with Color Corrections and exporting
To elevate the visual quality of the selected footage, color correction plays a vital role. Within Blender, adjustments were applied to enhance the colors, contrast, and overall aesthetic appeal of the clips. These corrections ensure that the footage stands out, making it more appealing to potential buyers on stock video platforms.
The, just add an adjustment layer over the strip and make colors pop a little bit. This was made with a DJI Mini 2, whose results are almost there, but I thing they are improvable. Take into account that the sun will affect the video conditions, so try to adapt the “adjustment” layer to the position and details you want to reveal.
My basic workflow is without mask. I don’t use to overprocess the shots so I use to go with the regular Curves, Brightness and Contrast and Hue Correct. My setup for sun and clouds and sun in the top:
- Curves: up a little bit the darks and medium range while keeping the hights almost in their middle point.
- Brightness/Contrast: up Bright around 5 and contrast around 10.
- Hue: adapt it to your scene. In this case and want to enforce greens and blues.
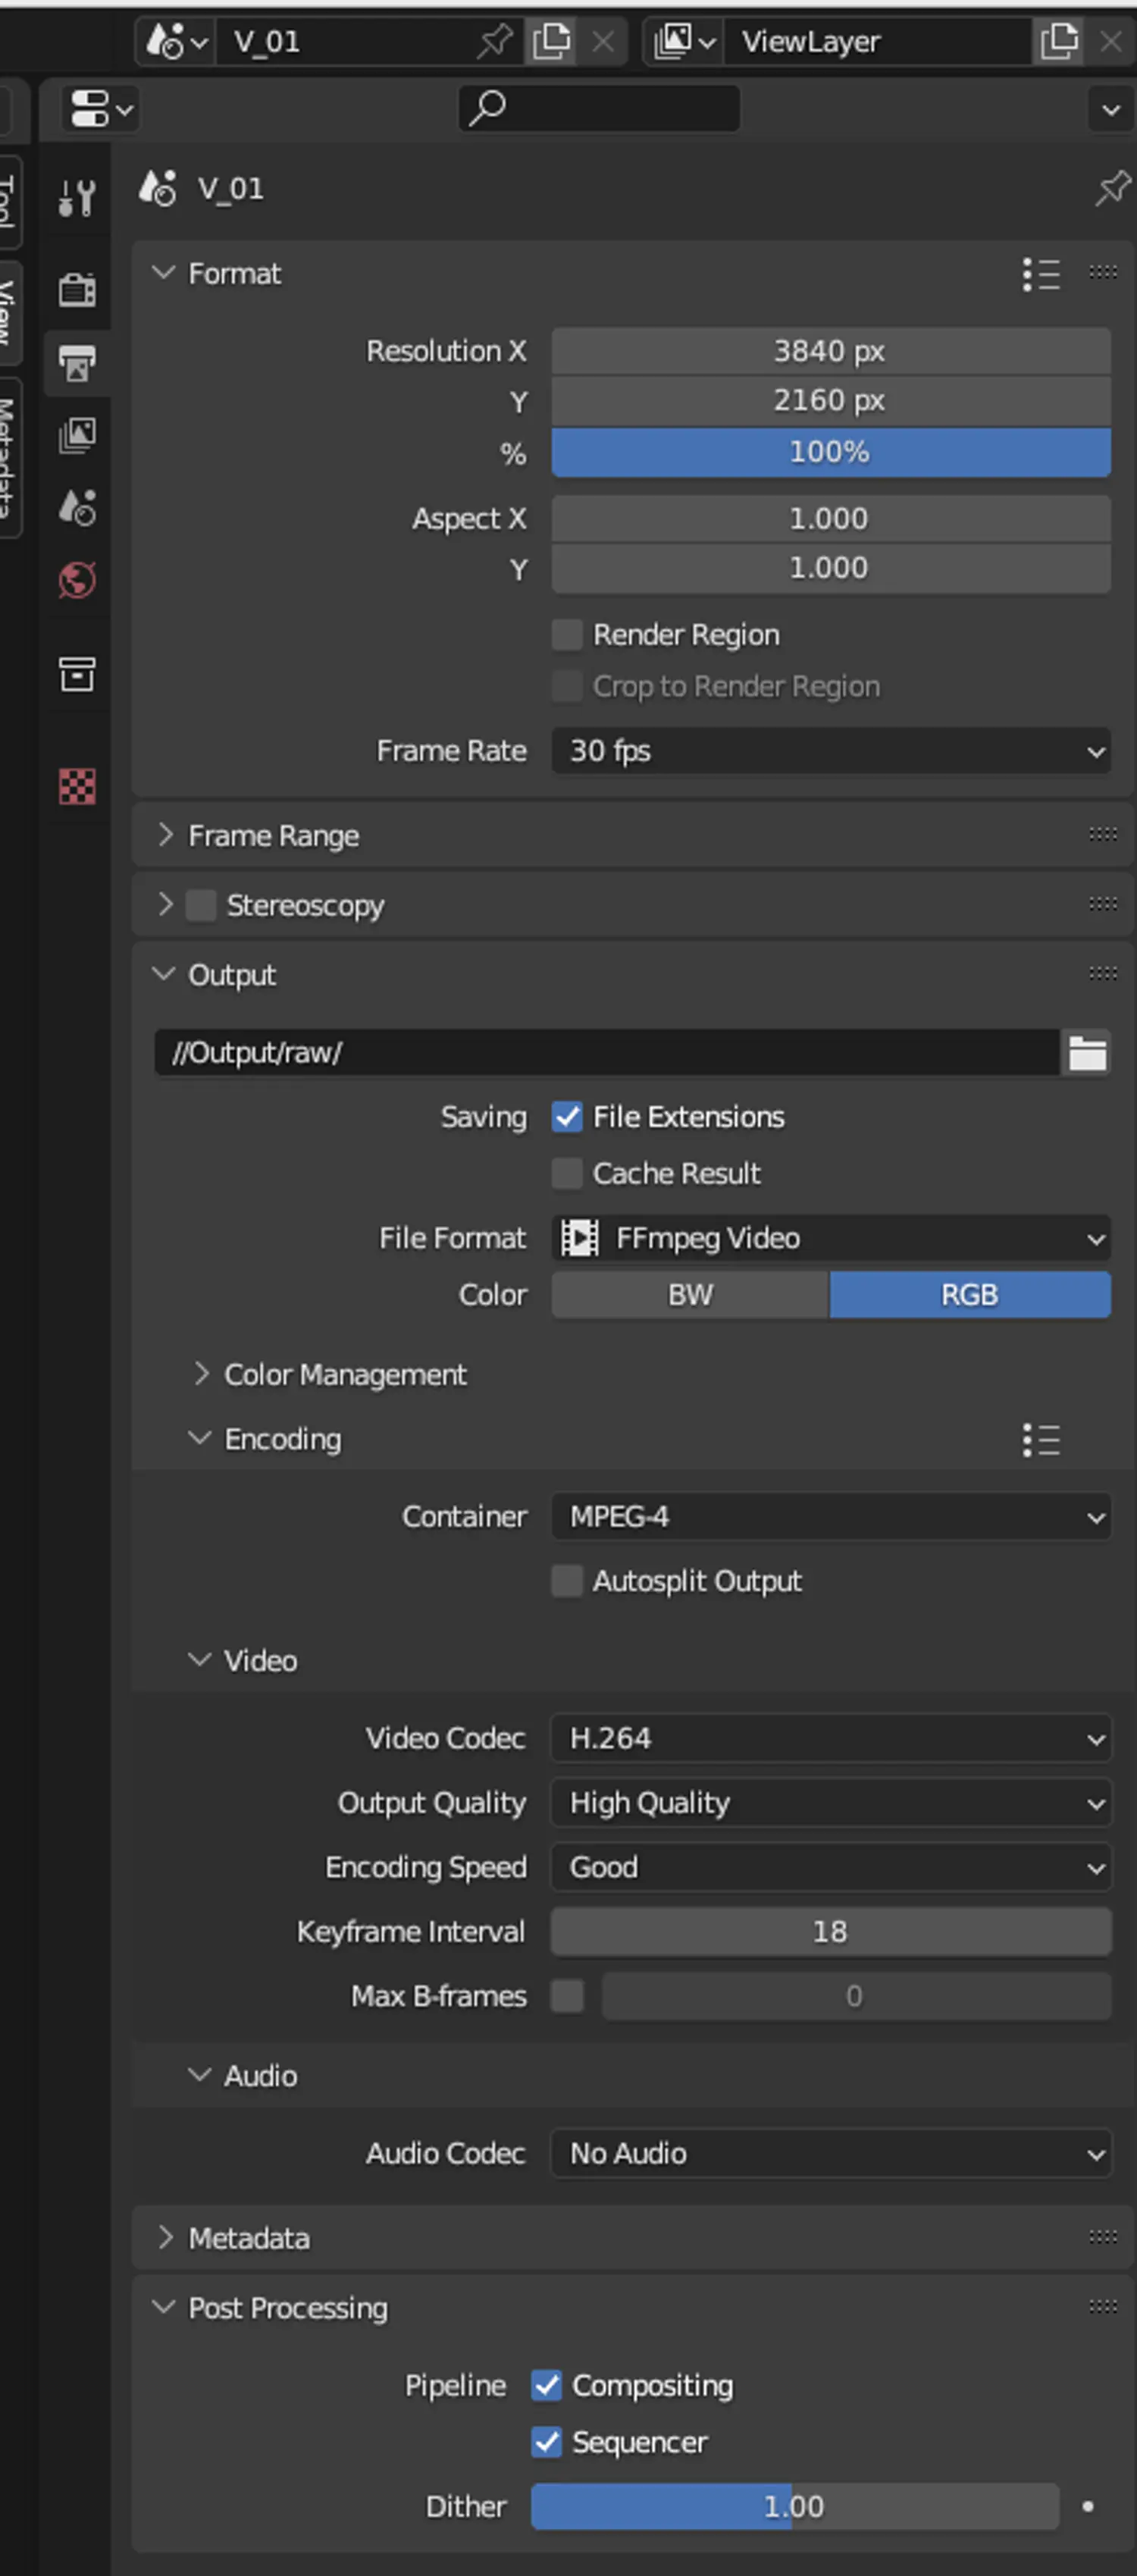
When you have set up your strips, it is time to export them to single files. I don’t like to go one by one, setting the starting frame, the ending frame, and so on. What I do instead, is to set up the relative path where this four videos are going to go. I dont’t need a name for them because they will be renamed with the frames of the exportation, therefore, they will be in order. This is the set up:
Now it is the get out for a coffe part. I know that in windows this can be also done, but I don’t know the process. For sure it is as simple as here. You can let me know in the comments. I know how to do things properly and fast with terminal in linux (Ubuntu 22.04 in this case). This is the simplification:
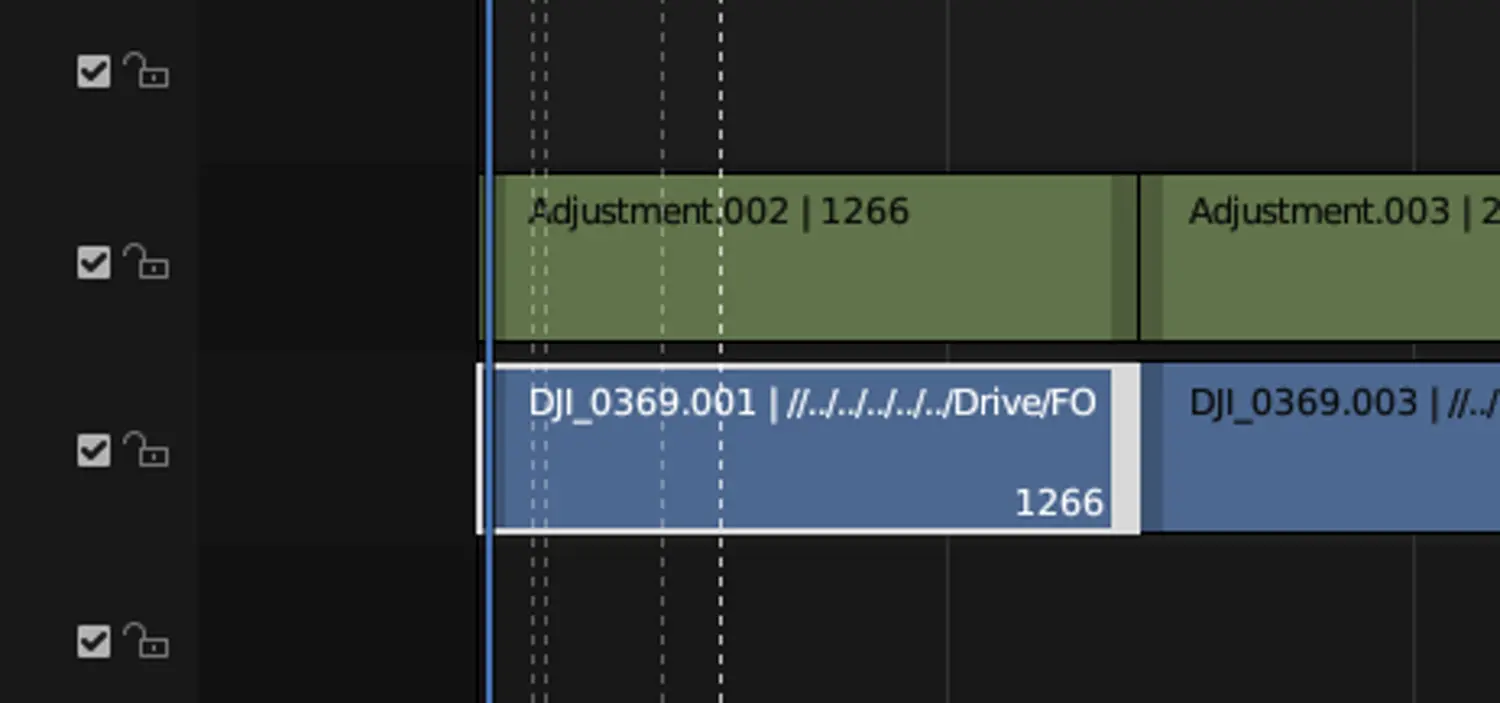
- Annotate the ending frame of each strip. To know that just click in the vertical gray part of the strip. In this example, the first strip stars in 1 and ends in 1266
- Annotate this and prepare your super chunk to export all the videos at once. Directly from terminal, right into your Output folder (//Output/raw). Here is my code, where
edit.blendis the blender file,V_01is the Scene name and the other numbers are the start and end of each of the videos.
blender -b edit.blend -S V_01 -s 1 -e 1266 -a
blender -b edit.blend -S V_01 -s 1267 -e 3287 -a
blender -b edit.blend -S V_01 -s 3288 -e 4423 -a
blender -b edit.blend -S V_01 -s 4424 -e 6481 -a
Arriving at this points, I tested if opening four terminals and sending one of this processes to each line improves productions. I didn’t find that this works as a paralelization. The process will take almost the same time and your screen will be dirty while on it. So I just use the full chunk like it is. Clean and simple. Just remember one thing, in linux, to use this simple chunk, you mast be in the folder where edit.blend is. You can either open terminal by ctrl+alt+t and with cd you can go to the folder. The fastest way for me, is open Nautilus, open the folder where the blender file is and then, right click on the folder to “Open terminal from here”. This makes the chunk much simpler and you don’t need to always write the full path to the file. Thanks.
These commands efficiently create distinct clips, setting the stage for a seamless and captivating storytelling experience.
3. Exporting Footage Using FFmpeg
FFmpeg, a versatile multimedia framework, comes into play. Among all the tools, this library offers (even Blender uses it while processing and exporting), the denoise algorithms could be the most valuable ones.
Noise can be a significant challenge in drone footage, especially in low-light or high-ISO situations. To ensure the final videos are of premium quality, denoising algorithms were applied to the exported footage using FFmpeg. It could be great to have this things implemented in the Blender modifiers, but they aren’t for the moment (as far as I know). May be there are some addon or something that I miss. Please, let me know if denoise can be applied directly in Blender VSE.
Back to FFmpeg. Part of this post is to make a final video where I put all together one of the clips and compare it with their own but with denoise applied. I tested this with 3 different denoiser. There are more, but this are the ones that doesn’t take days and give you a good results. These are hqdn3d, vaguedenoiser and atadenoise.
Again, instead of process each video at a time you can denoise them all in in one step using terminal. Again, go out for a coffe time. My workflow process is:
- Videos should be exported to a “/raw” folder as you have seen before.
- From that folder, iterate over the
.mp4files and export them with the same name but adding a final “_01/_02/_03”, depending on the denoise applied. - The name of the file is maintained, so you don’t need to worry about overwriting and these things.
This is the chunk that allows you to go while processing. Again, use this from the folder where your videos are. Keep in mind a couple of things:
- The
../${i%.*}_01.mp4exports the video, with the same original name and then it appends the _01 part and places it in the upper folder level. - The
-crfis the Constant Rate Factor: higher values leads to lower video quality. Below 15-18 is hard to notice differences and it increases the file size a lot. If you want max detail, keep it around 18-20. To reduce file size go for a 25-28. Now that I’m thinking about it…why don’t I make a comparison of crf exportations ??…may be in other posts.
This is the chunk for terminal:
# Good denoise
for i in *.mp4 *.mkv; do ffmpeg -i "$i" -vf "hqdn3d" -c:v libx264 -c:a copy -crf 18 "../${i%.*}_01.mp4" -y; done
# Denoise based in nlmeans but faster
for i in *.mp4 *.mkv; do ffmpeg -i "$i" -vf "vaguedenoiser" -c:v libx264 -c:a copy -crf 18 "../${i%.*}_02.mp4" -y; done
# Denoise based in nlmeans but faster (I THINK THIS IS THE ONE TO USE)
for i in *.mp4 *.mkv; do ffmpeg -i "$i" -vf "atadenoise" -c:v libx264 -c:a copy -crf 18 "../${i%.*}_03.mp4" -y; done
Once again, you could use separate terminals to each trying to go for a ape parallelization but you processing time will remain the same as each of these lines uses already all your cores:
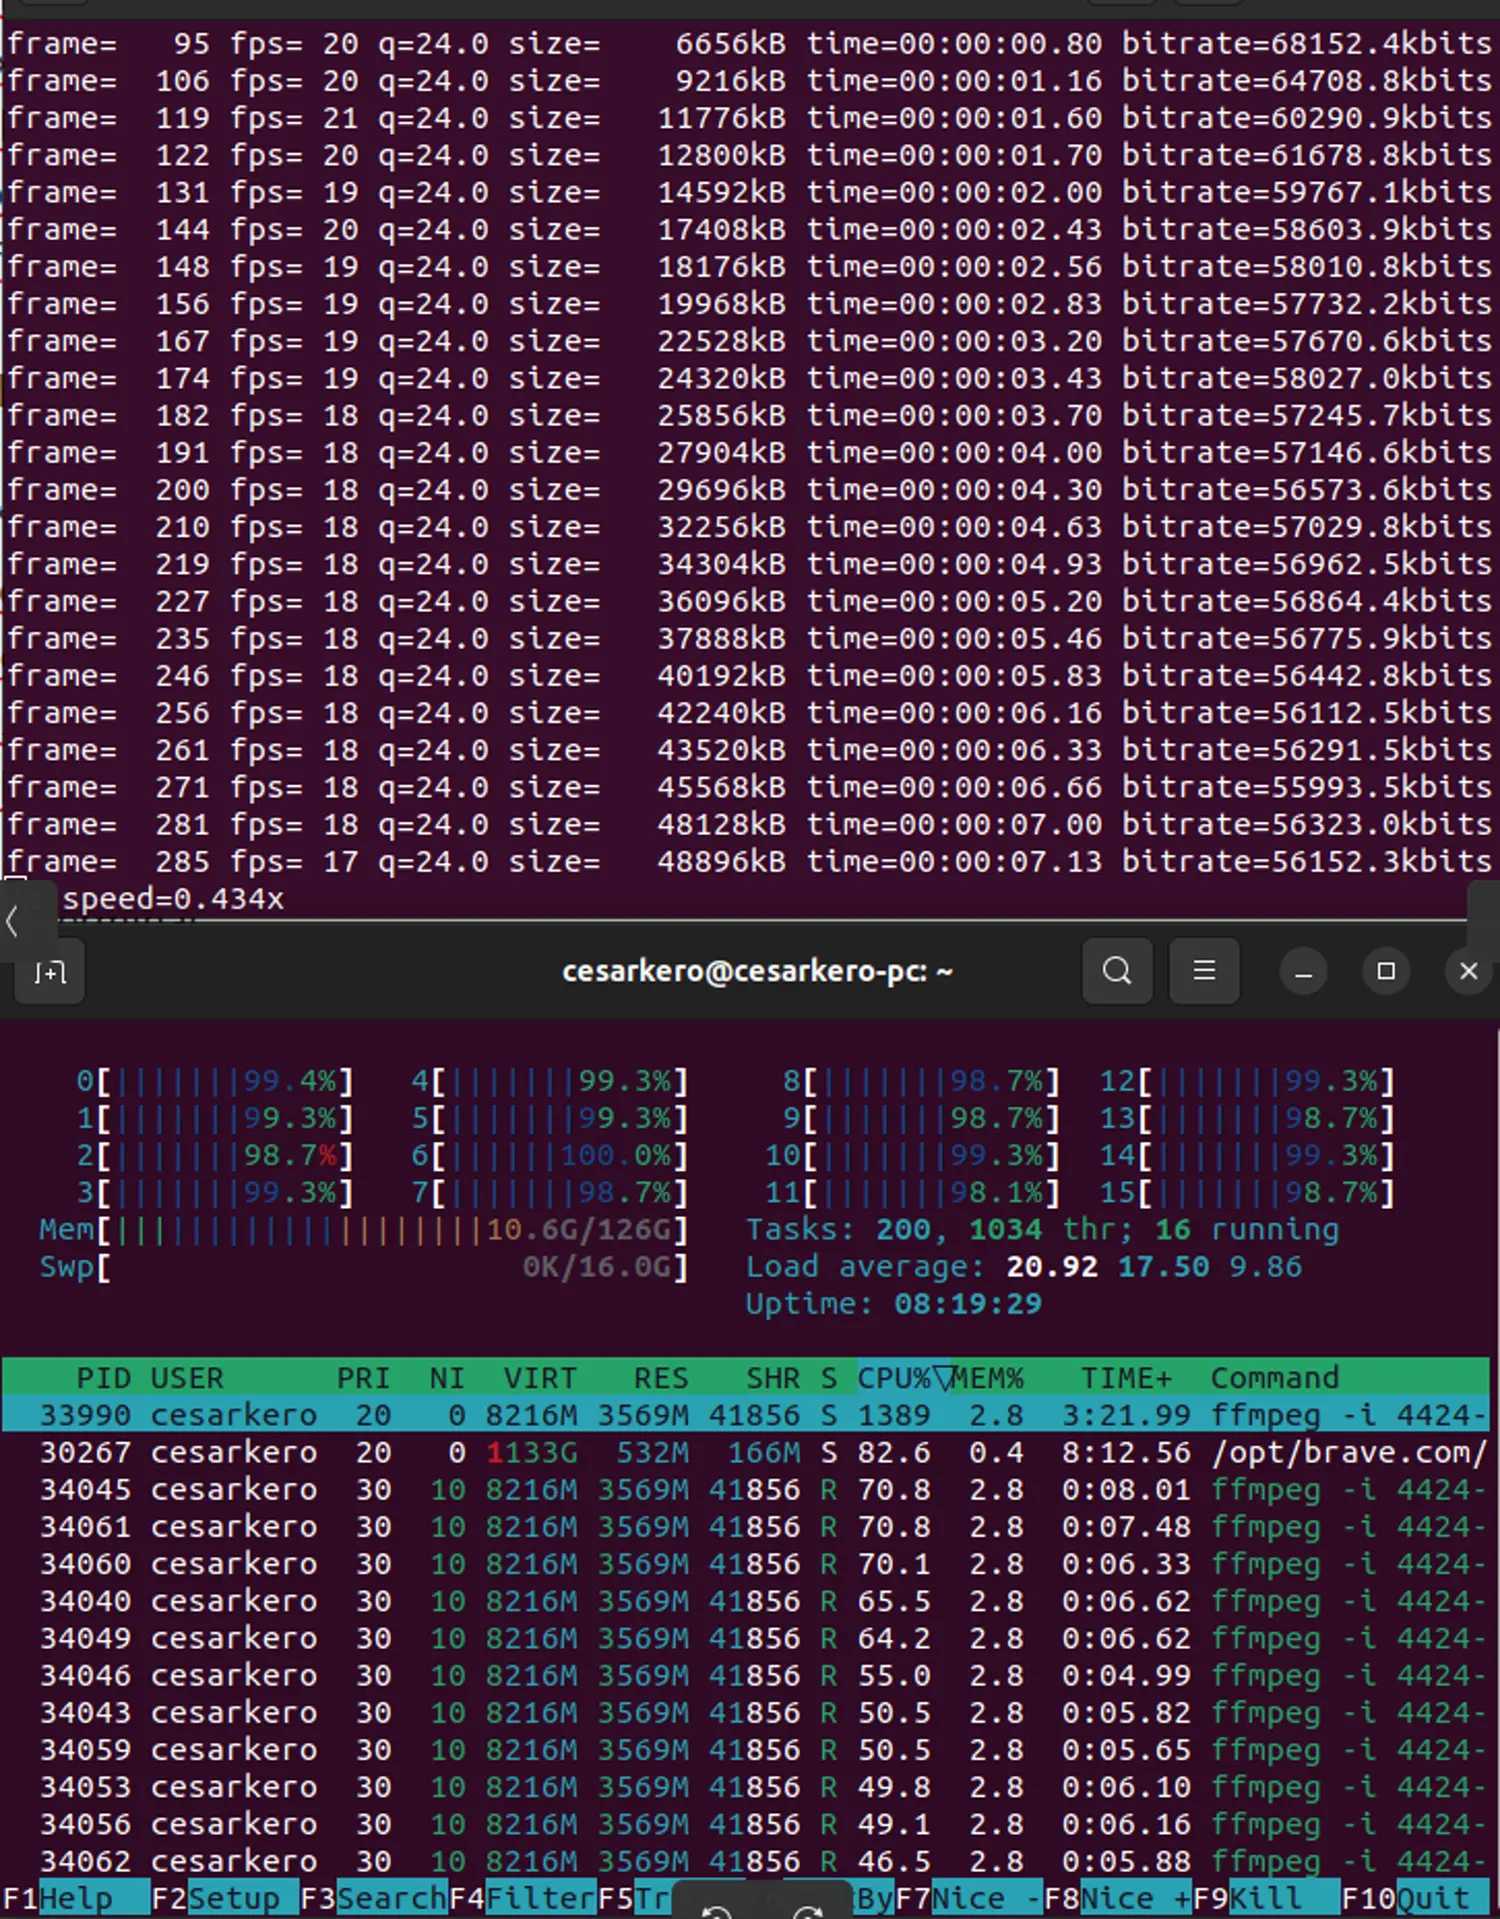
The chunk transforms each of the originals in 3 new versions with different denoisers applied. Thanks :-).
Experimenting with different denoising techniques allows you to find the best fit for your footage, striking the right balance between noise reduction and preserving essential details.
Here is the video where you can see some extra details and where you can really compare the footages produced.
4. Conclusion
Transforming drone footage into captivating stock videos requires a combination of thoughtful editing, color corrections, and effective denoising. By leveraging the power of Blender and FFmpeg, content creators can unlock the true potential of their drone footage, presenting stunning visuals that stand out on platforms like Shutterstock. So, the next time you take your drone for a flight, keep in mind the post-processing possibilities that await you, enabling your work to leave a lasting impact on audiences around the world.


