
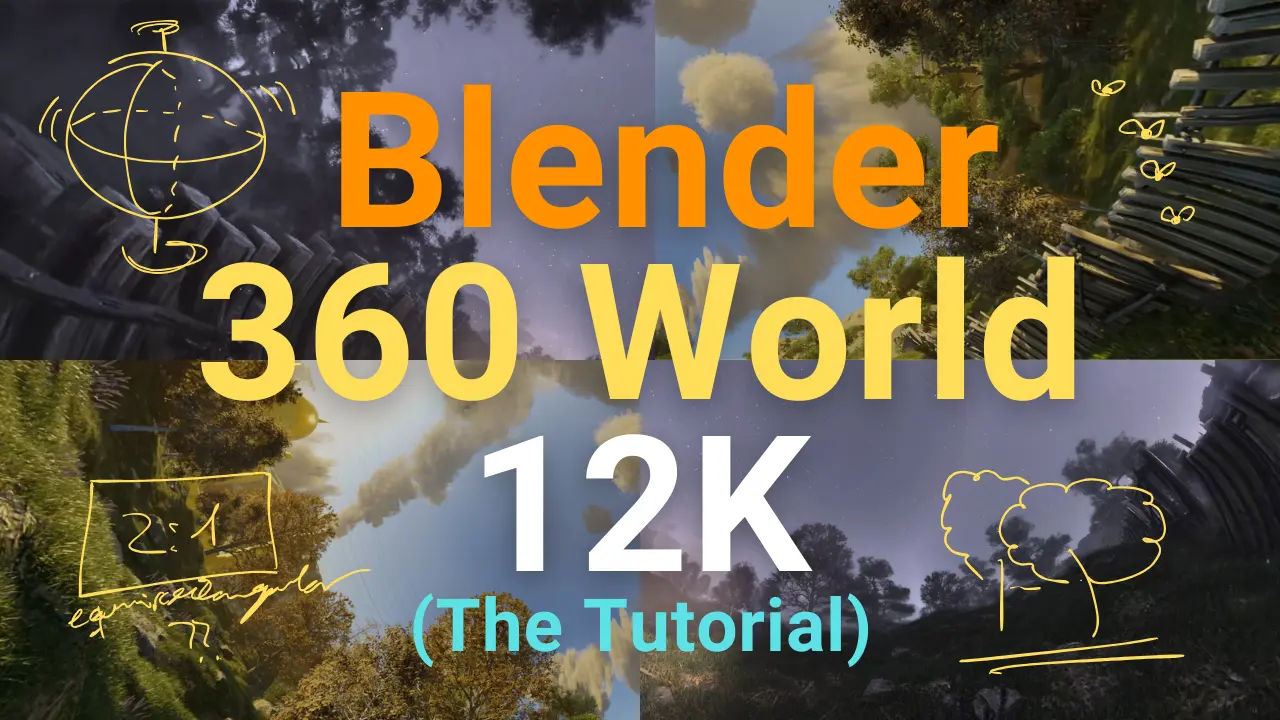
Render 360 landscape in 12 K. Blender tutorial for 360 World
In today's fast-paced digital landscape, where immersive content rules supreme, there's an ever-growing demand for creators to push the boundaries of visual storytelling. In this tutorial, we'll delve even more deeply into the art of crafting 360-degree worlds using Blender, going beyond the basics to explore advanced techniques for adding depth, realism, and interactivity to your virtual environments, all while ensuring that your content is in line with the latest trends and techniques in the world of immersive media. Content:- Prerequisites
- The layers
- Rendering tips
- Compositing
- Injecting metadata
- Conclusion - Ten Commandments of a Good Final Video Render
- The tutorial
Promises are meant to be kept. This is the tutorial on how to create 360 videos in Blender, using just free tools and getting the scene up to 12 K resolution. As I told you before, this tutorial is in spanish, because I didn’t have the patience to do it in english (neither the skillset) and I’m pretty sure about that that will be solved by new AI tools soon.
Nonetheless, I edited the video in english, adding labels and notes to get this understandable by any one. I also hope that the automatic youtube subtitles are going to be ready ASAP.
Before it, I leave here some of the things covered in the video and the principal notes as an script for it. The details on courses, associated tutorials and many more can be found here and in the video description. Let’s go:
Prerequisites
Before we dive in, make sure you have the following:
- Blender (latest version, Blender 3.6 at the time of this post)
- Botaniq addon (for vegetation)
- Camera Shakify addon (for realistic camera movements)
- Spatial Media Metadata Injector (to make the equirrectangular video be understood as 360 video)
The layers
1. Background
Mountains created with A.N.T Landscape (addon already in Blender) with trees where each tree is a simple “card”. You have plenty of tutorials on how to render large forests out there. Here you have one of the best ones.
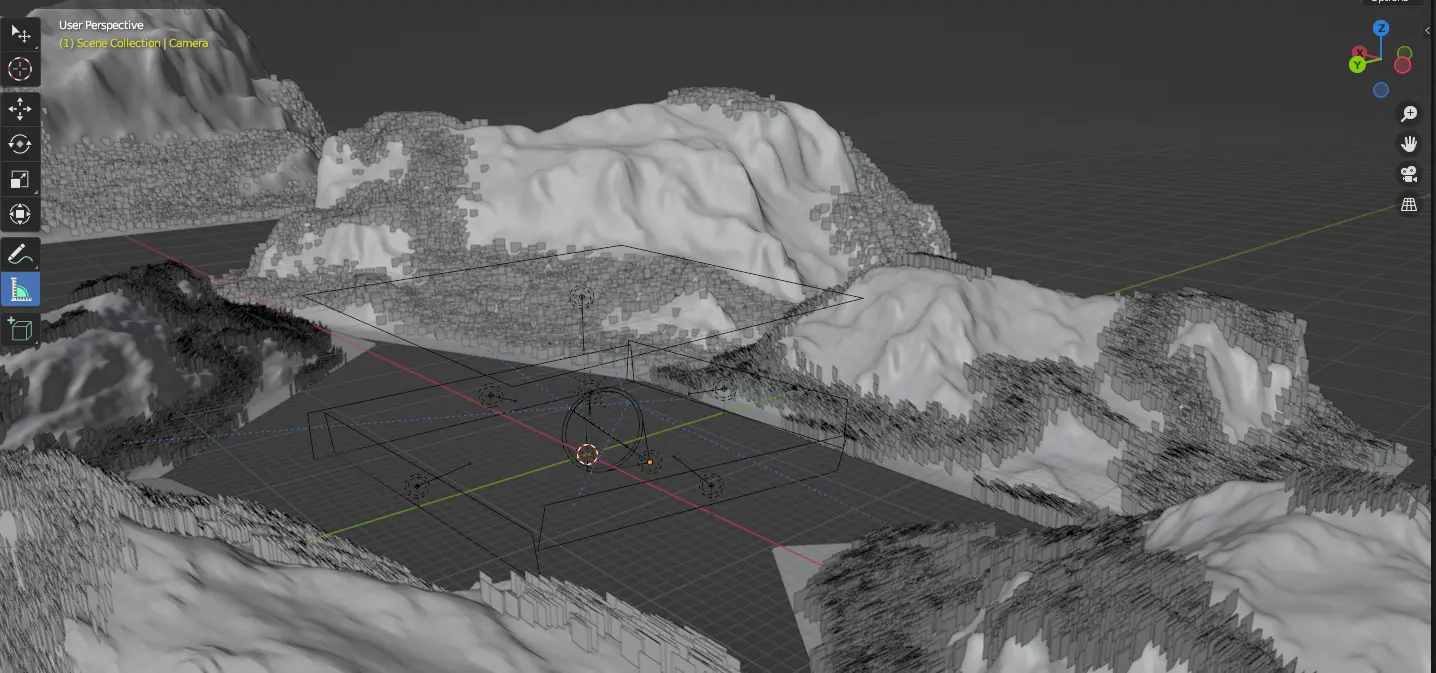
Mountains added with the ANT landscape tool
Tree added as a plane (check tutorials)
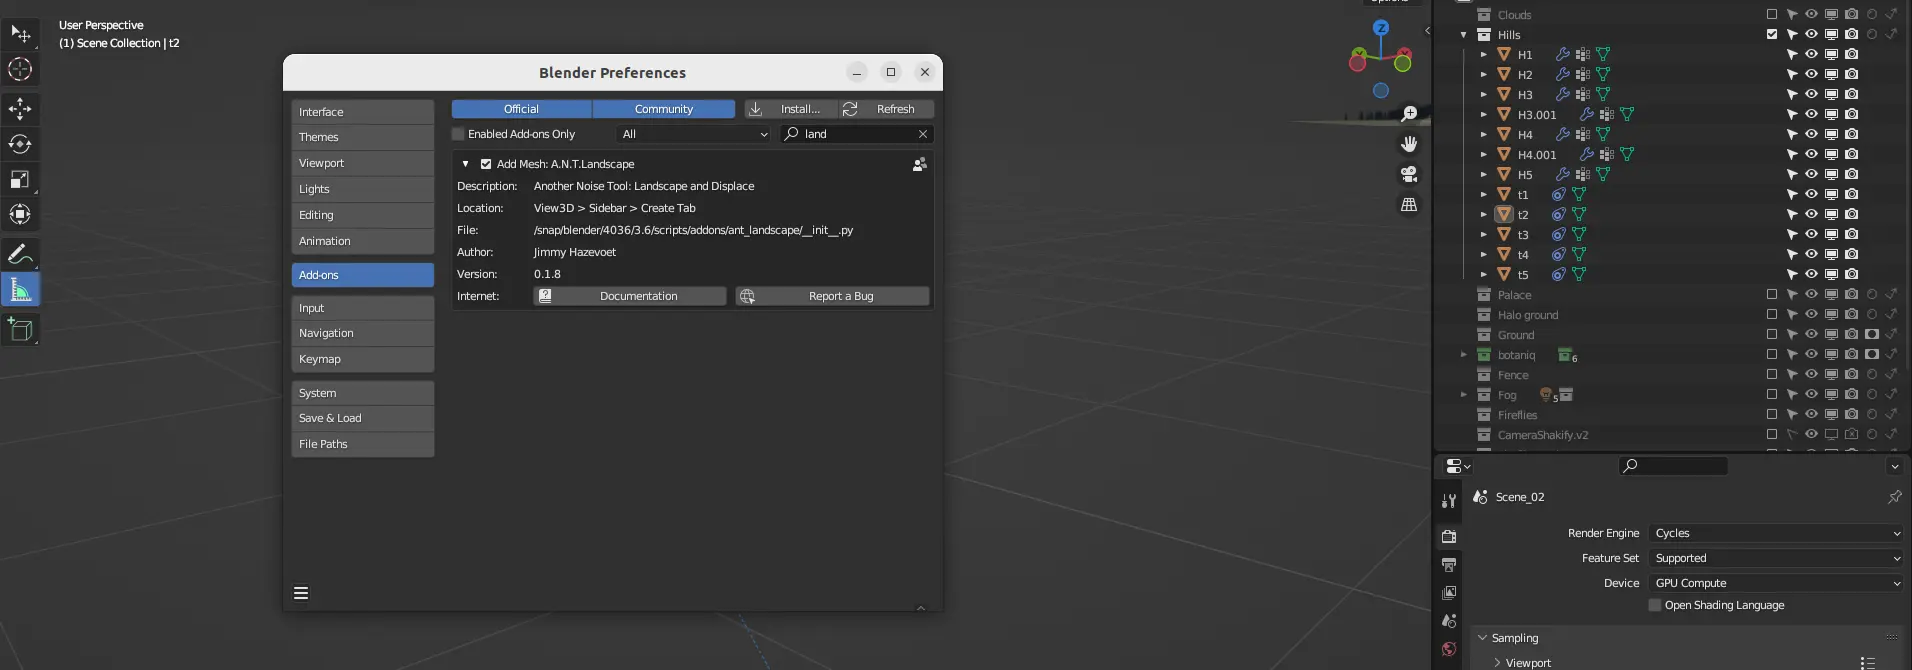
View of the addon (internal to Blender, but not activated by default)
2. Palace
The palace contains just the simple model of a palace, sorry for the creator because it was a free asset but I can’t find the source. I did some modifications on it and applied some materials: gold in the daylight and marble at night. I added some extra lights to atalayas and ground.

Palace of marble
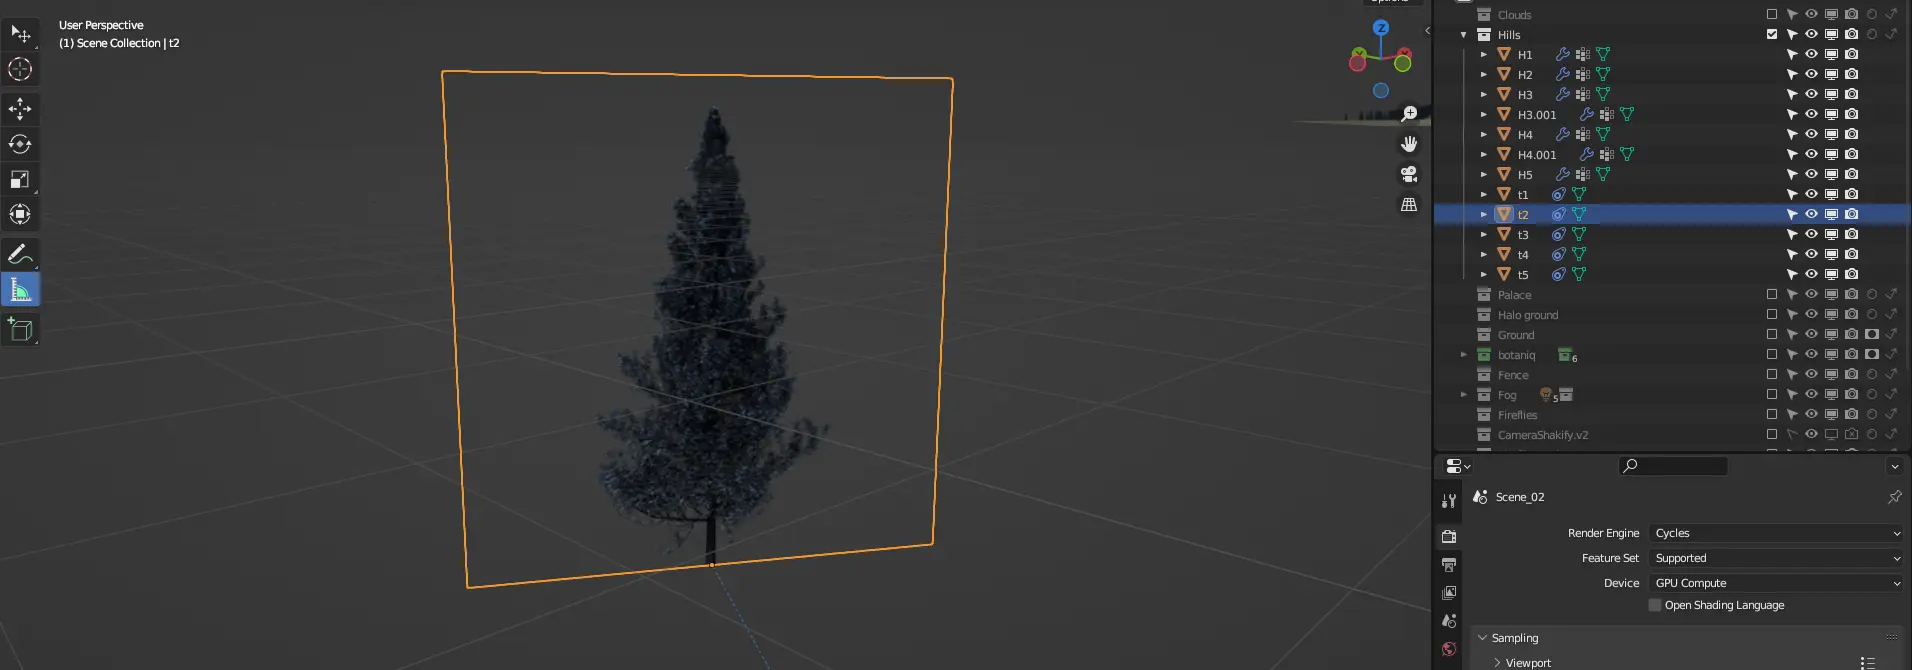
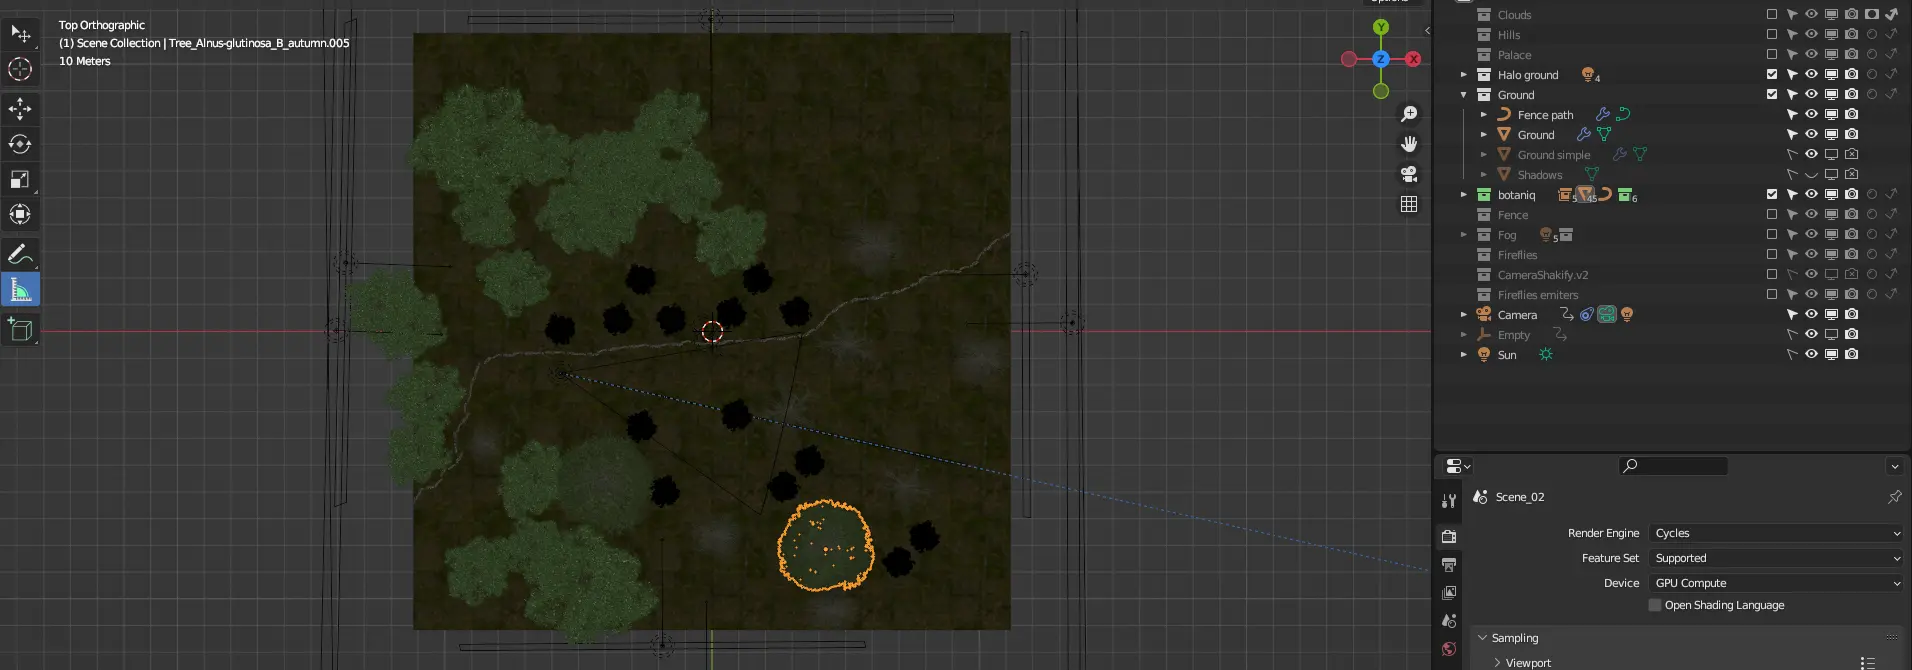
3. Ground
Here is the main layer, where the details really matters. It is composed with a simple plain, with subdivision and a complex geometry nodes adding textures, curvatures, stones, grass and bushes. Over the ground I added some tries from the Botaniq addon, which were animated and baked to increase performance in rendering.
To animate the trees this are the main steps:
- Add the wanted species, randomize and position these over the plane. Remember to press Snap to ground when they are in position.
- Convert to editable.
- Add Animation, in this case I’ve used the light breeze.
- Select the location for the baked files. My recommendation is to save these in a folder called “botaniq_animations” that is within a folder called for example
BLENDER_BAKES. I use this folder as a temporal folder to stores these bakes. It is good to save these in a secondary HDD. - Press Bake to Alembic. This should be done for each of the trees, grass and bushes. This generates an
.abcfile that stores those animations and makes rendering faster.
Postions the trees over the plane
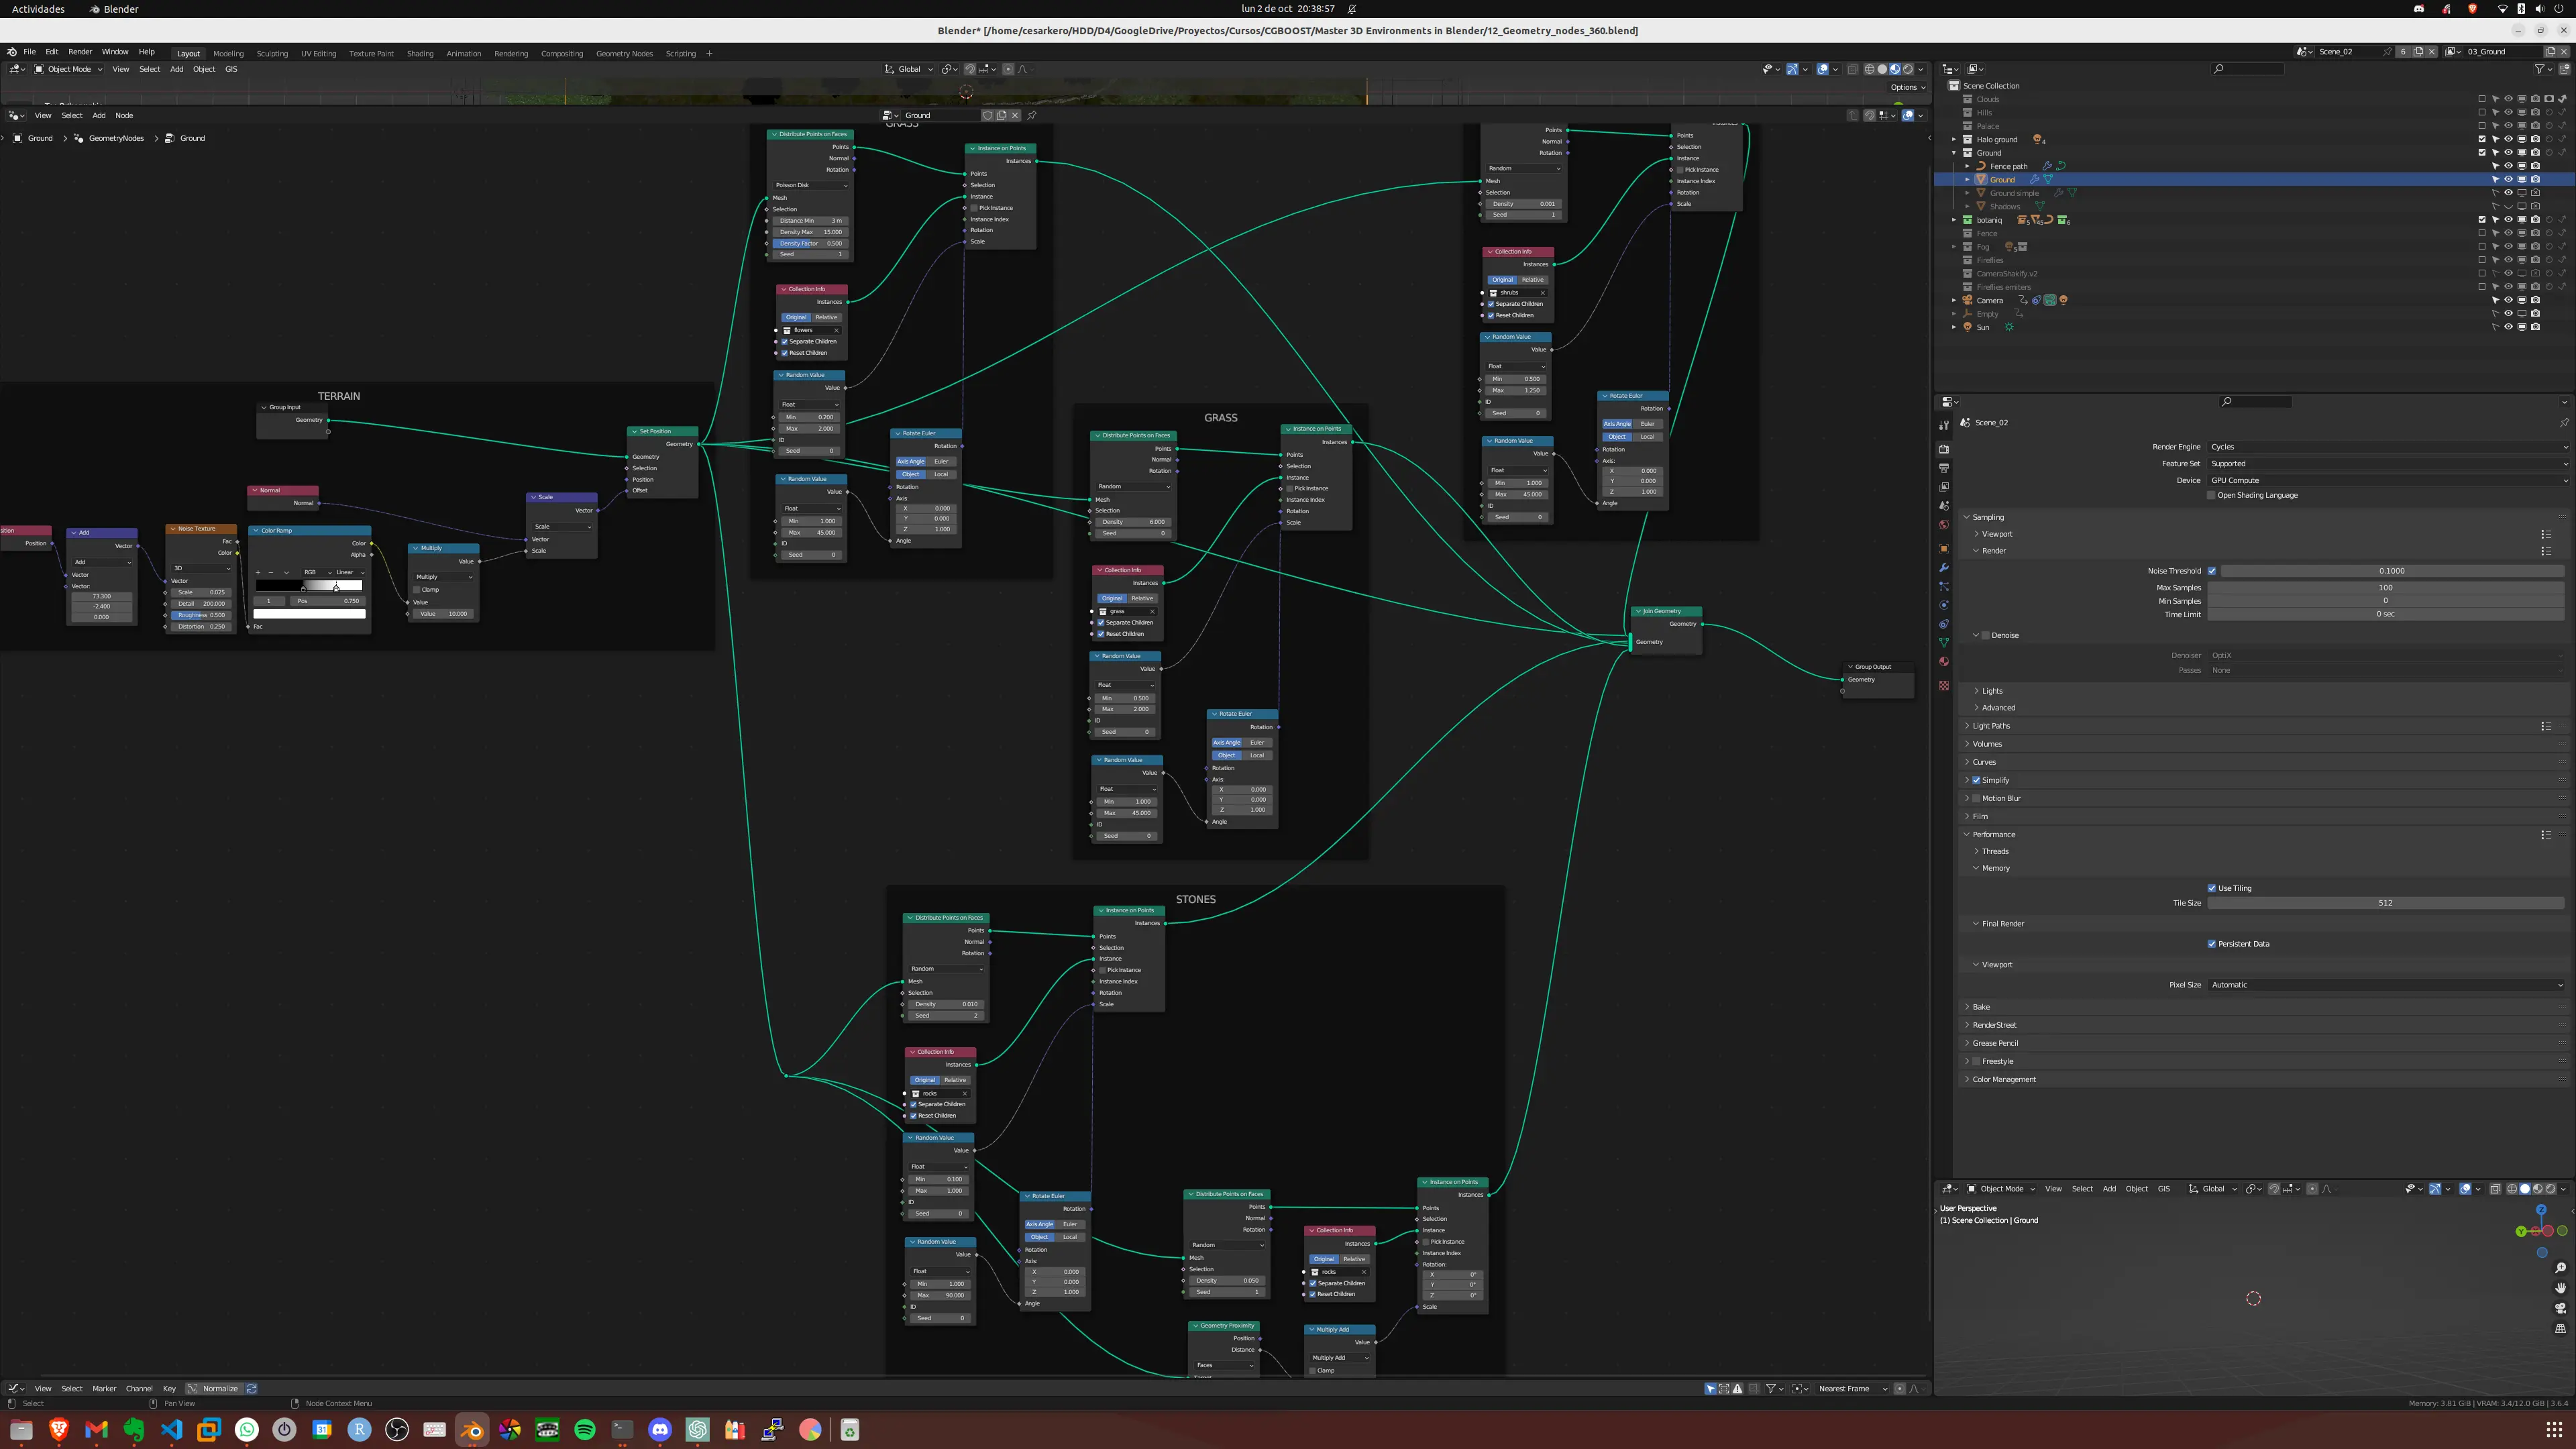
Geometry nodes

Animate and bake the movement
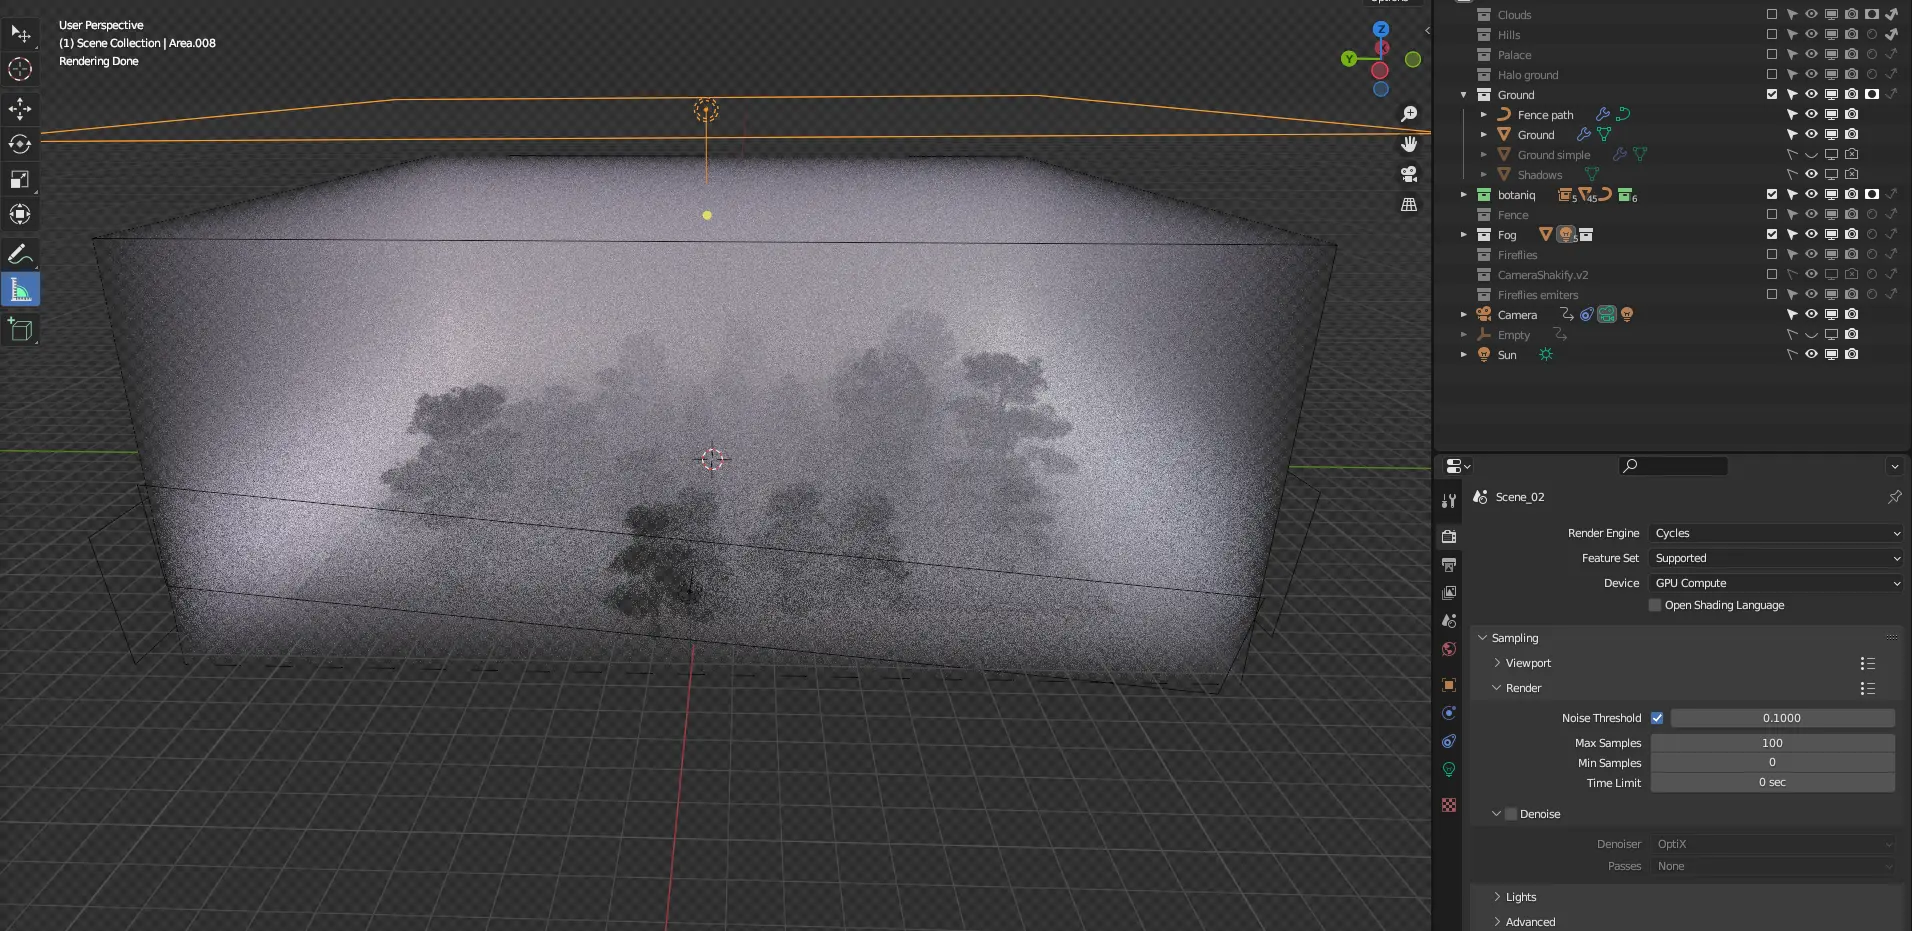
4. Fog
This is a simple box that covers all the ground. You can add extra lights to power up the scene. Notice that this is rendered using holdouts for the ground and trees. This is a must have, as otherwise the fog will not be affected by the elements.
5. Sky
This is just the simple world HDRI image. It could have been rendered just once. Nobody would have noticed but, in order to get the perspective of the starts and the lights coming from the right place, I did the effort to render all the frames with the little distortion produced in image. You can check that in the video in more detail. Here I left you the image of the config and two frames where you can check the change between them.
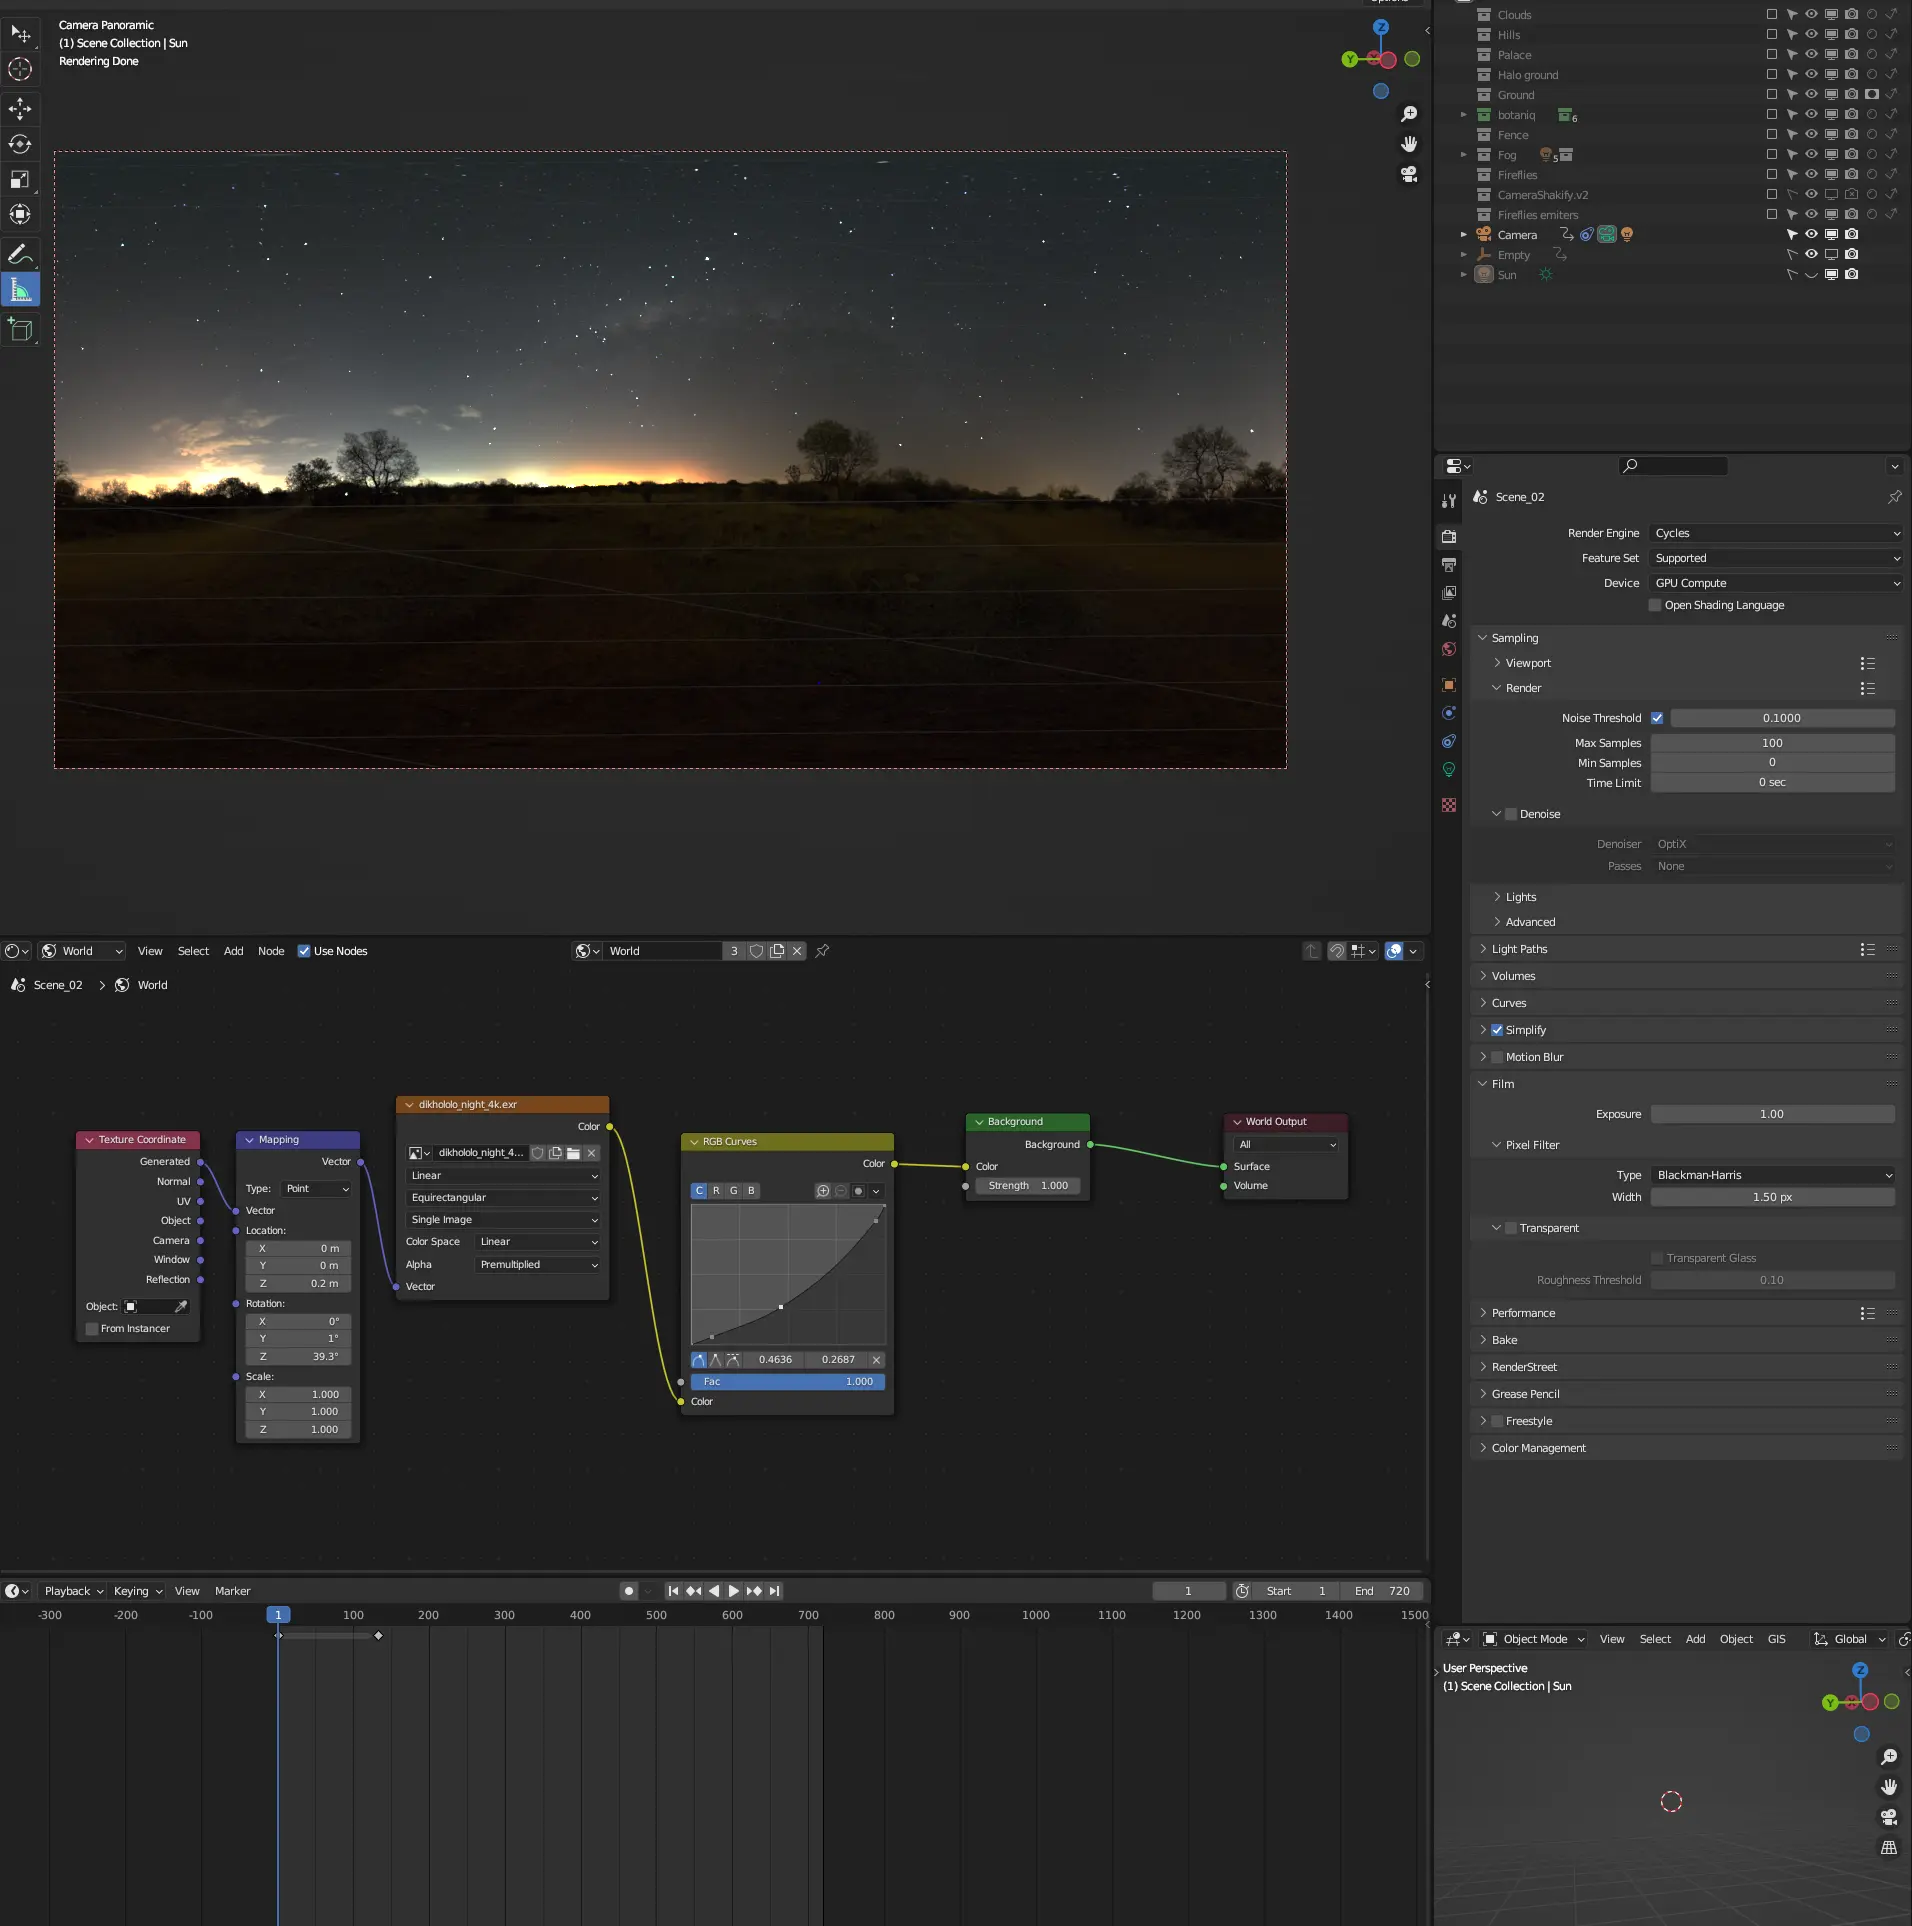
Full config for world
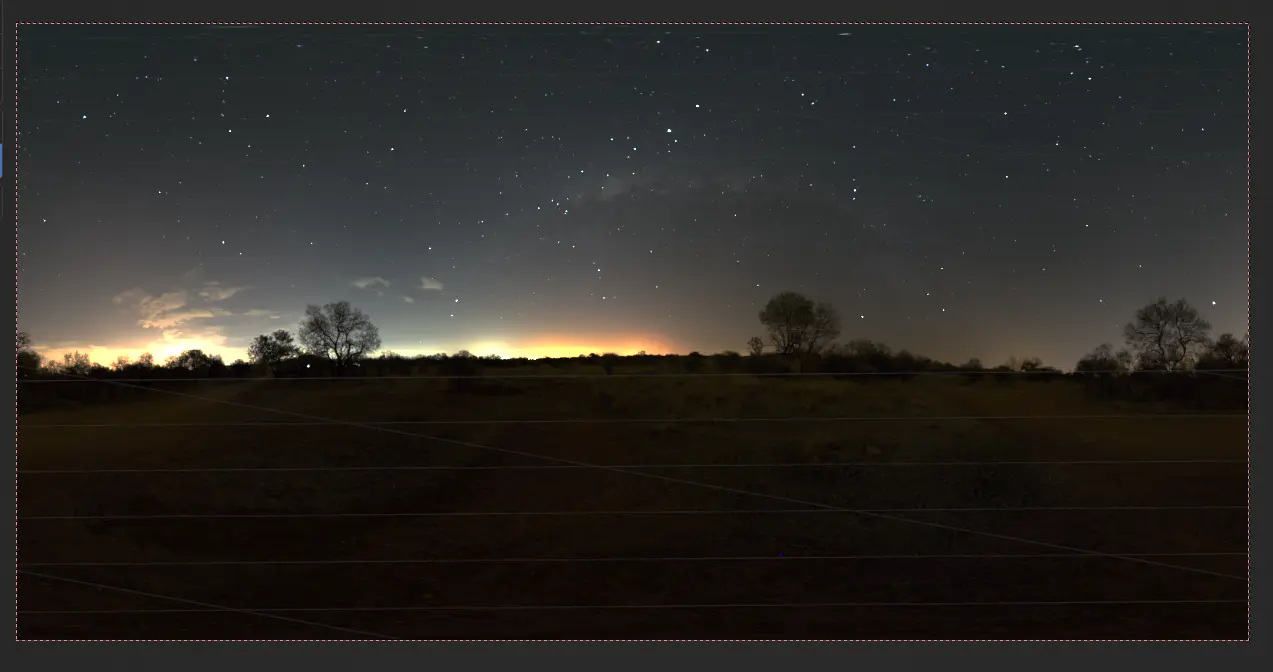
Sky at frame 1
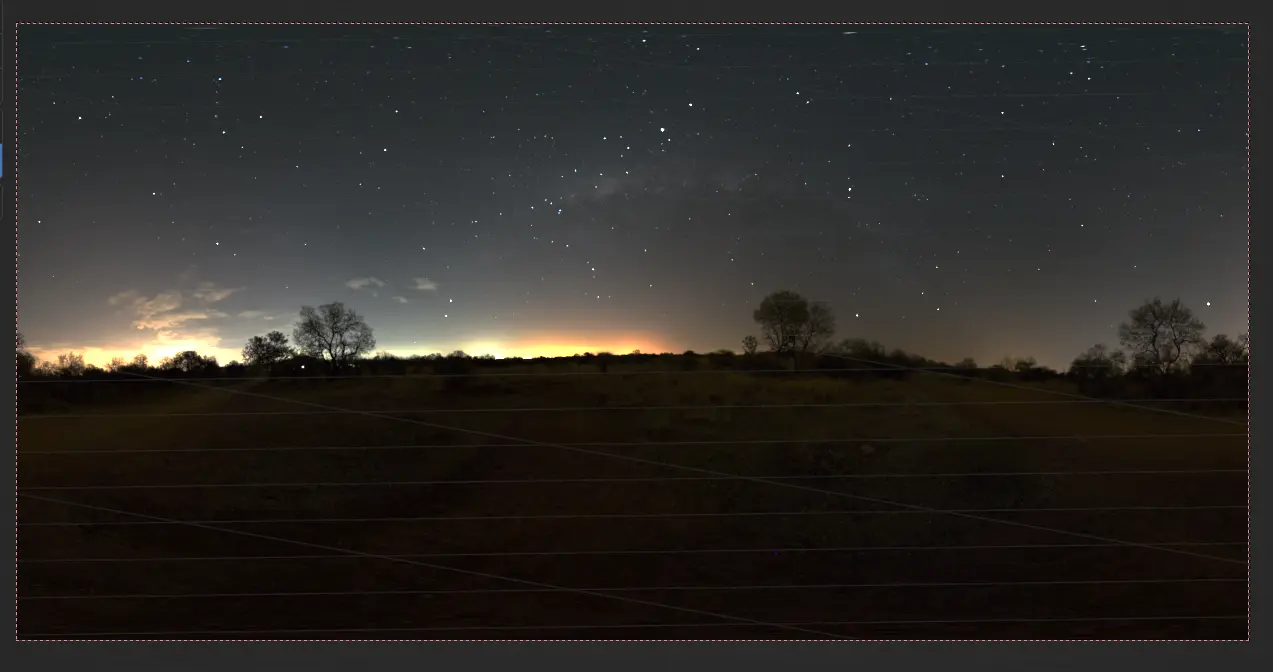
Sky at frame 720
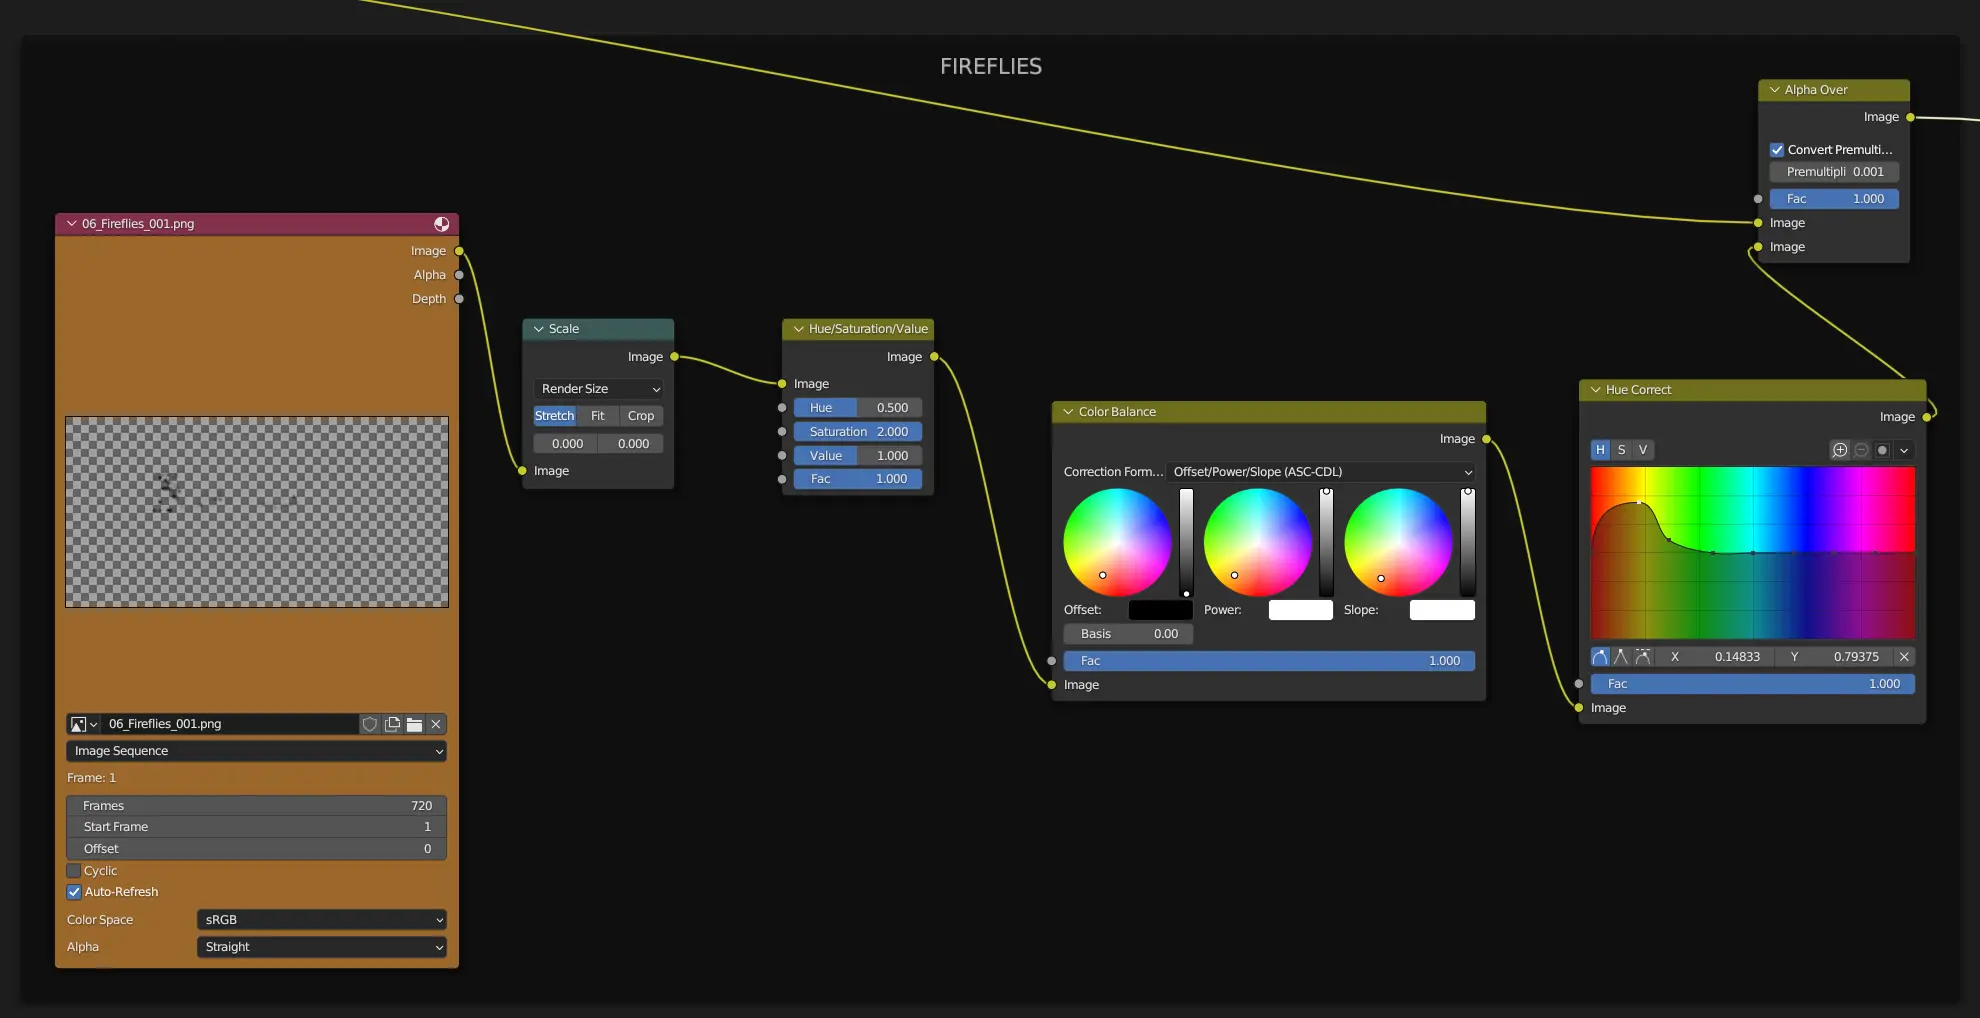
6. Fireflies
Fireflies were the last detail added to the scene. You can follow this tutorial to create these. Basically these are created from an emitter created with, again, geometry nodes. I added different materials in order to create some tilting/flickering effect in these “particles”. You can check more about this in the video or in the following images.
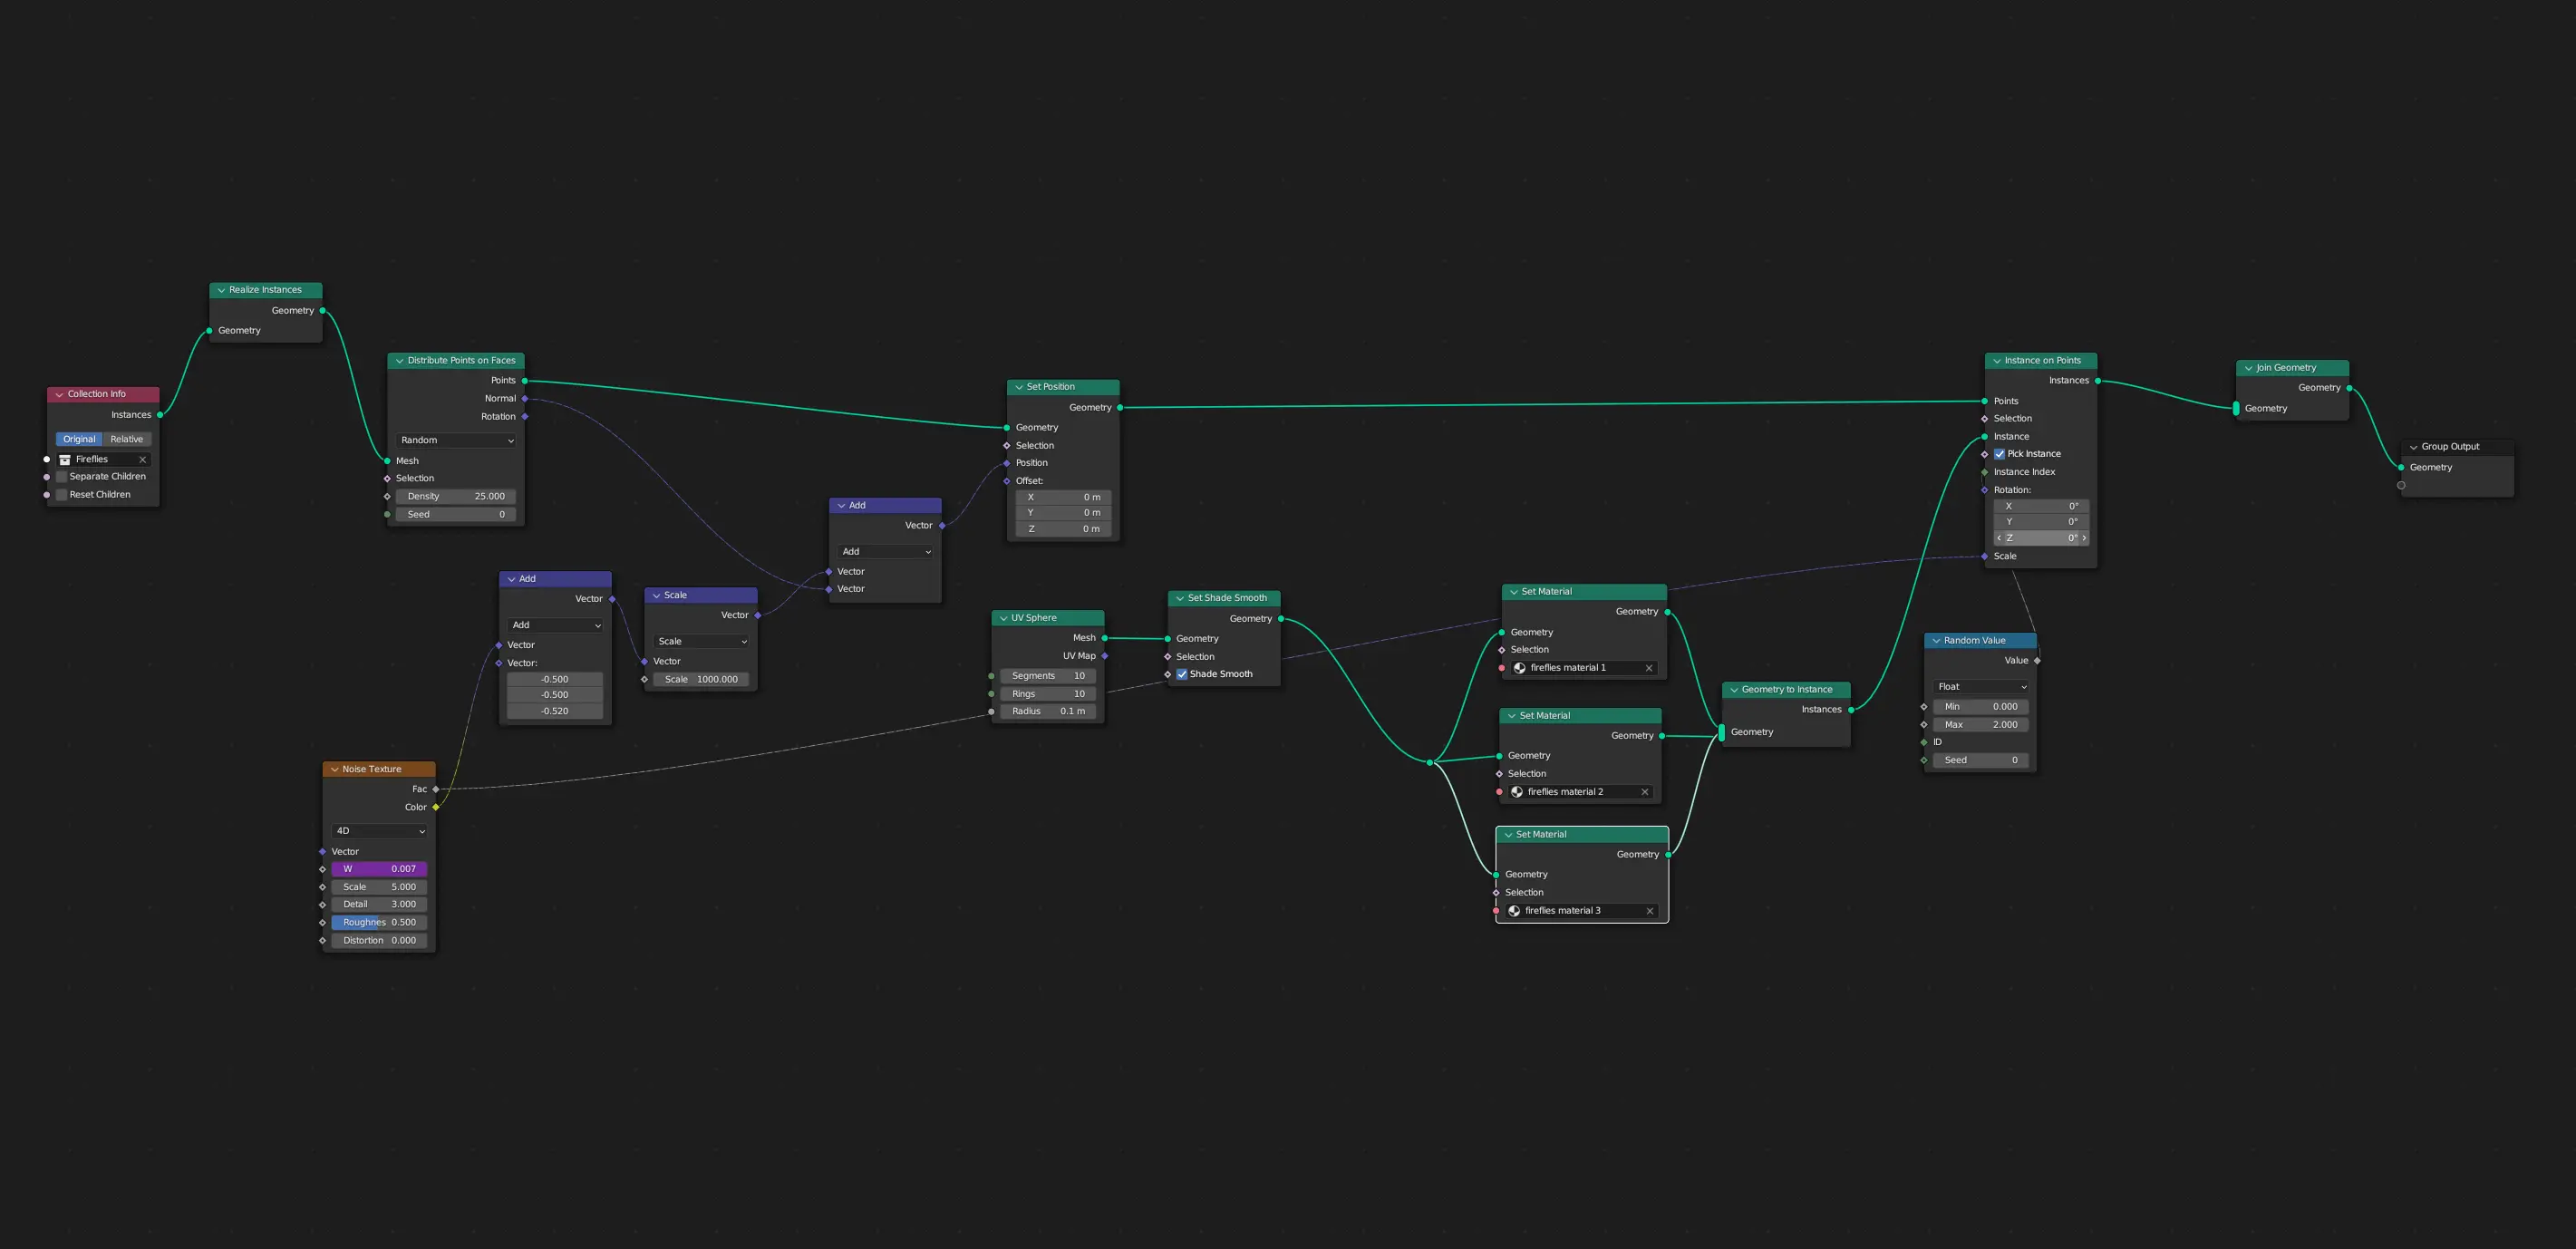
Geometry nodes for fireflies
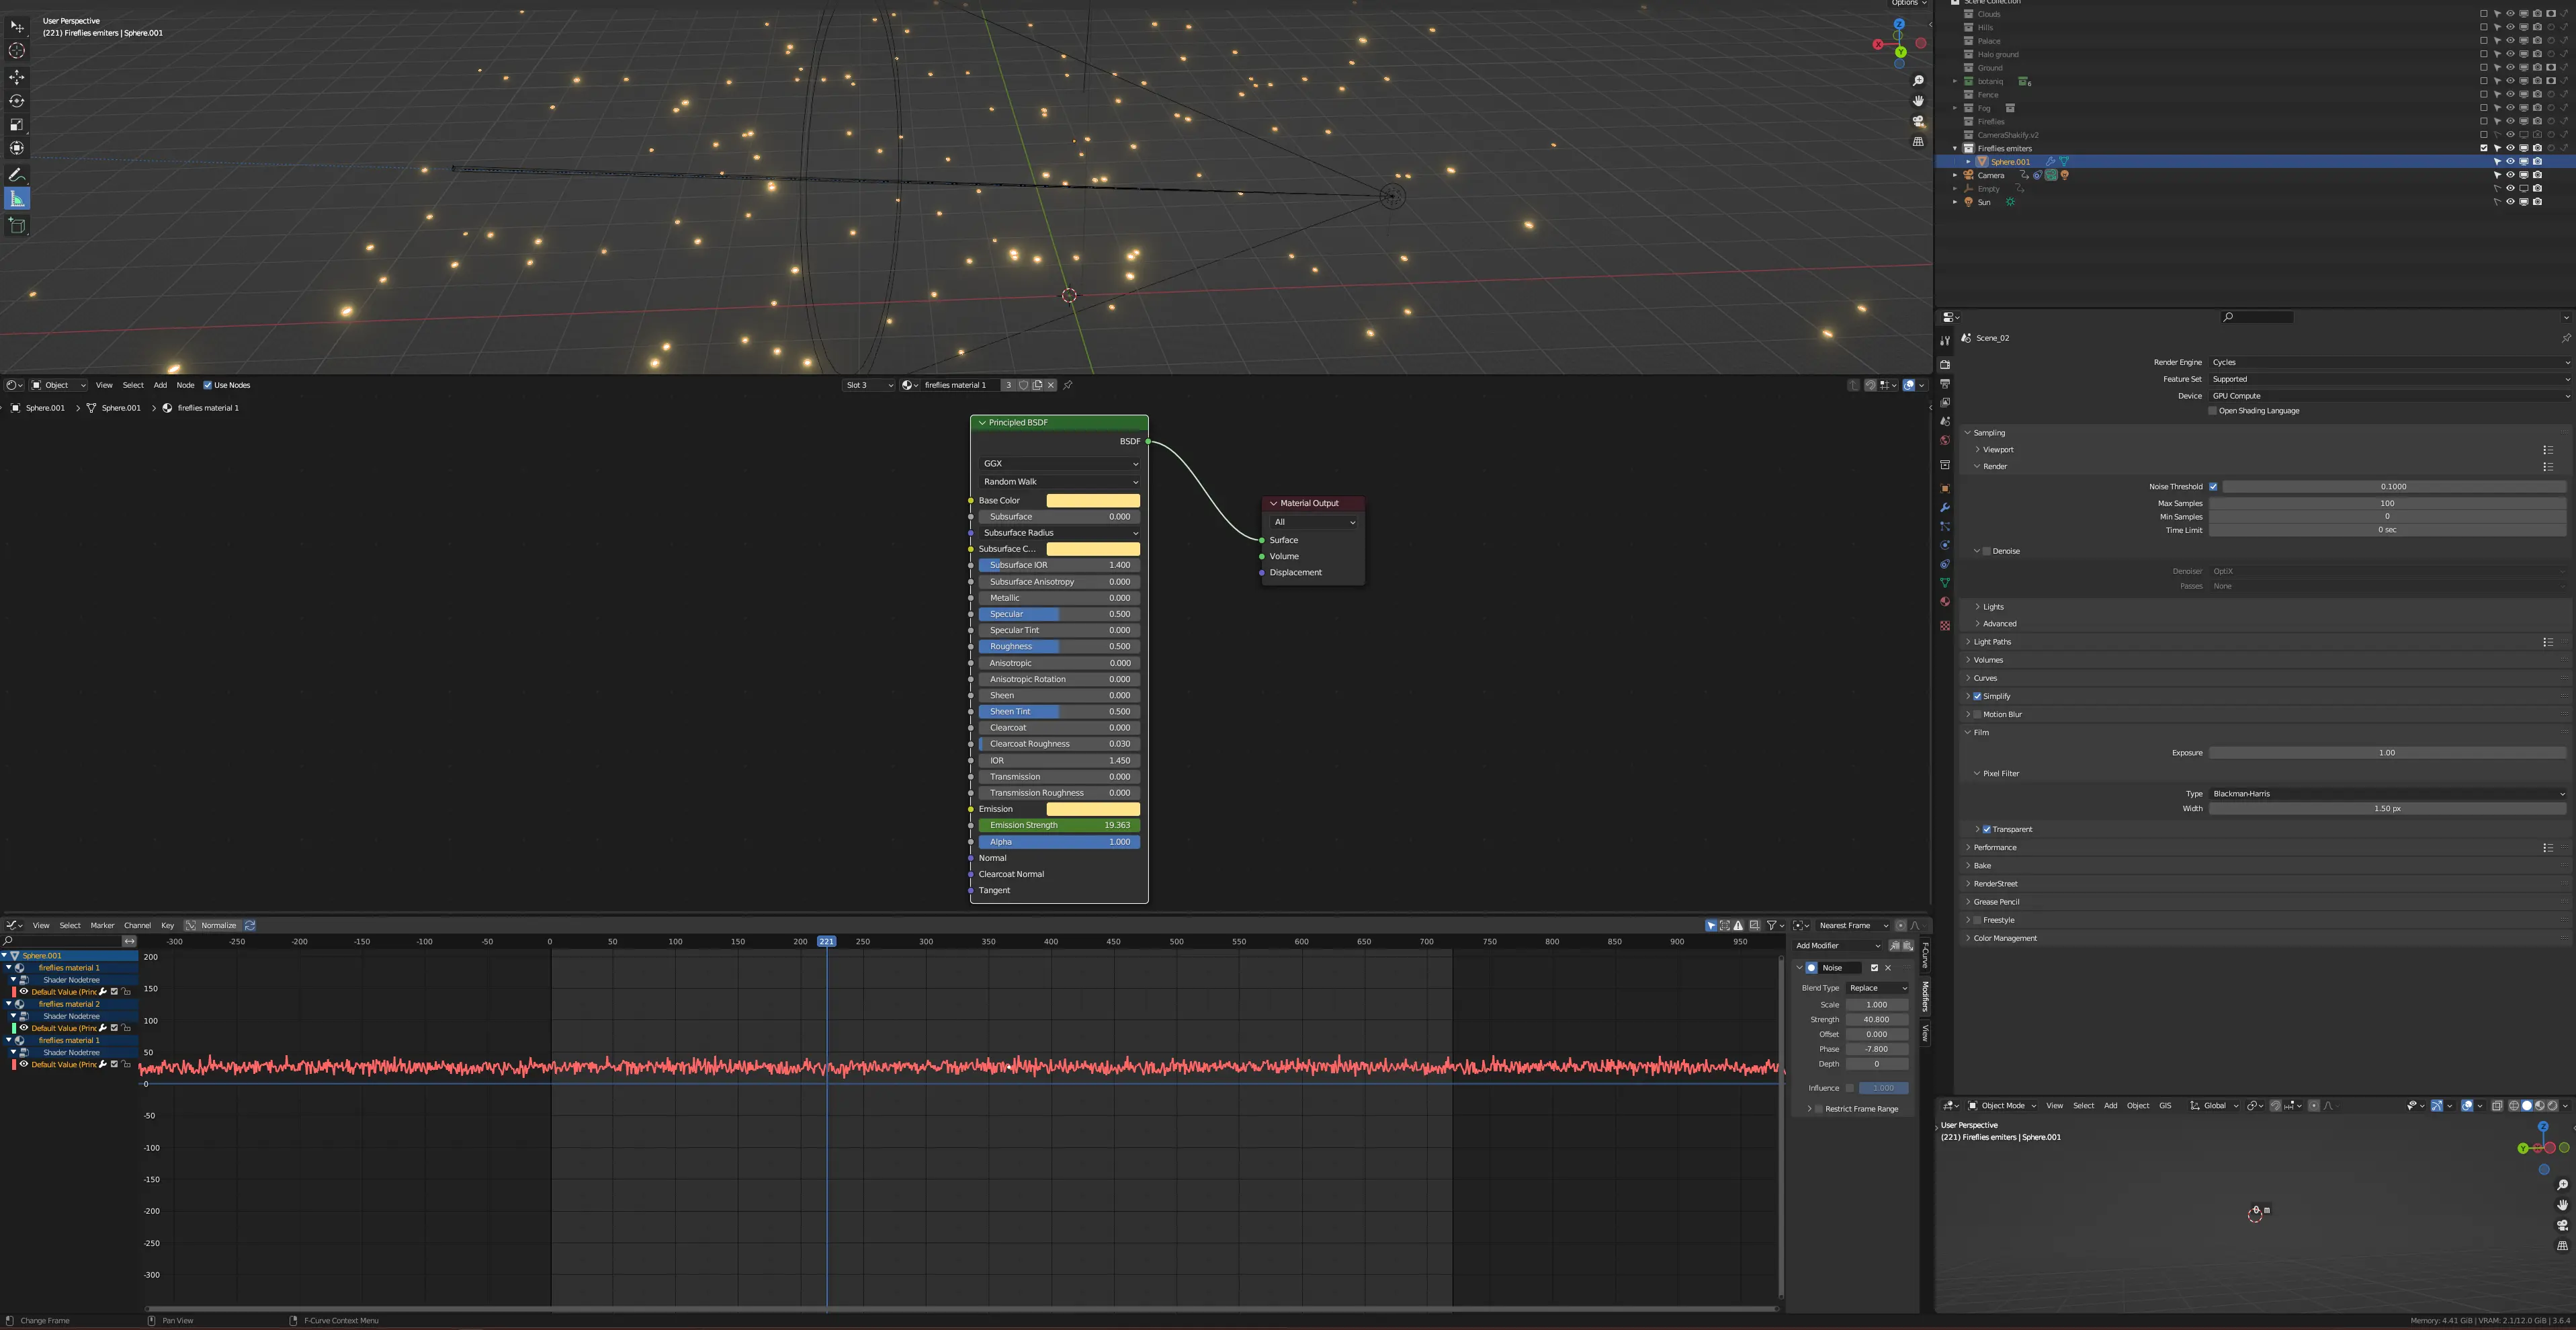
Emission with noise
Rendering tips
I will just insist in some details that can help you in the rendering at huge resolutions.
Use Optix instead of CUDA
OptiX and CUDA are both technologies used for GPU rendering in Blender, and each has its advantages and use cases. The choice between OptiX and CUDA depends on several factors, including your specific hardware and the rendering scenarios you’re working with. Here are some reasons you might choose OptiX over CUDA in Blender:
-
Better Performance on NVIDIA RTX GPUs: OptiX is designed to leverage the specialized hardware in NVIDIA RTX GPUs, which includes ray tracing cores. This can result in significantly faster rendering speeds compared to CUDA, especially when dealing with ray tracing-intensive scenes.
-
Real-time Ray Tracing: OptiX can provide real-time ray tracing capabilities in Blender’s viewport, allowing you to interactively preview scenes with complex lighting and reflections. This can be extremely useful for artists and designers who want to see how changes affect the final look without waiting for long renders.
-
Improved Denoising: OptiX also offers advanced denoising features that can produce cleaner and more visually pleasing results, reducing the need for longer rendering times or post-processing to remove noise.
-
AI Acceleration: OptiX can take advantage of AI and machine learning features in RTX GPUs, like AI denoising, which further enhances the rendering process by reducing noise without compromising image quality.
-
Optimized for Complex Scenes: For scenes with a high level of complexity, OptiX can be more efficient, as it is designed to handle demanding ray tracing tasks and can offer better performance in these scenarios.
However, it’s important to note that OptiX is exclusive to NVIDIA GPUs, so if you’re using a different GPU brand like AMD, you won’t have the option to use OptiX. Additionally, the specific performance benefits of OptiX versus CUDA can vary depending on the scene and hardware configuration. Therefore, it’s a good practice to test both rendering options to determine which one works best for your particular project. Blender provides the flexibility to switch between them based on your needs and available hardware.
In this scenario, the complexity of the ground (with dense grass) and trees made CUDA too slow, specially in the previous parts of rendering, when elements are composed and load. For this complex scene, OptiX worked much better.
Cut the resolution (at half) if possible
This could help you in some cases. Backgrounds, skies or other further elements can be rescale after it. You will lose some details, for sure, but you can save a lot of time and disk space. In this case, sky, background, fog and fireflies where cut at half.
Rendering volumes
You can to so many things rendering volumes, here are some:
- In light paths, reduce steps and max steps…but…increase transparency. Otherwise you will find black spots in your image.
- Increase the noise threshold value: 0.1 could be reasonable.
- Apply denoise and reduce drastically the samples (+-100).
- Activating Fast GI approximation (FGIA) will increase processing speed but it will reduce lights entering the scene, which lead to a darker image. If you don’t mind about getting up those lights later in compositing, go for it.
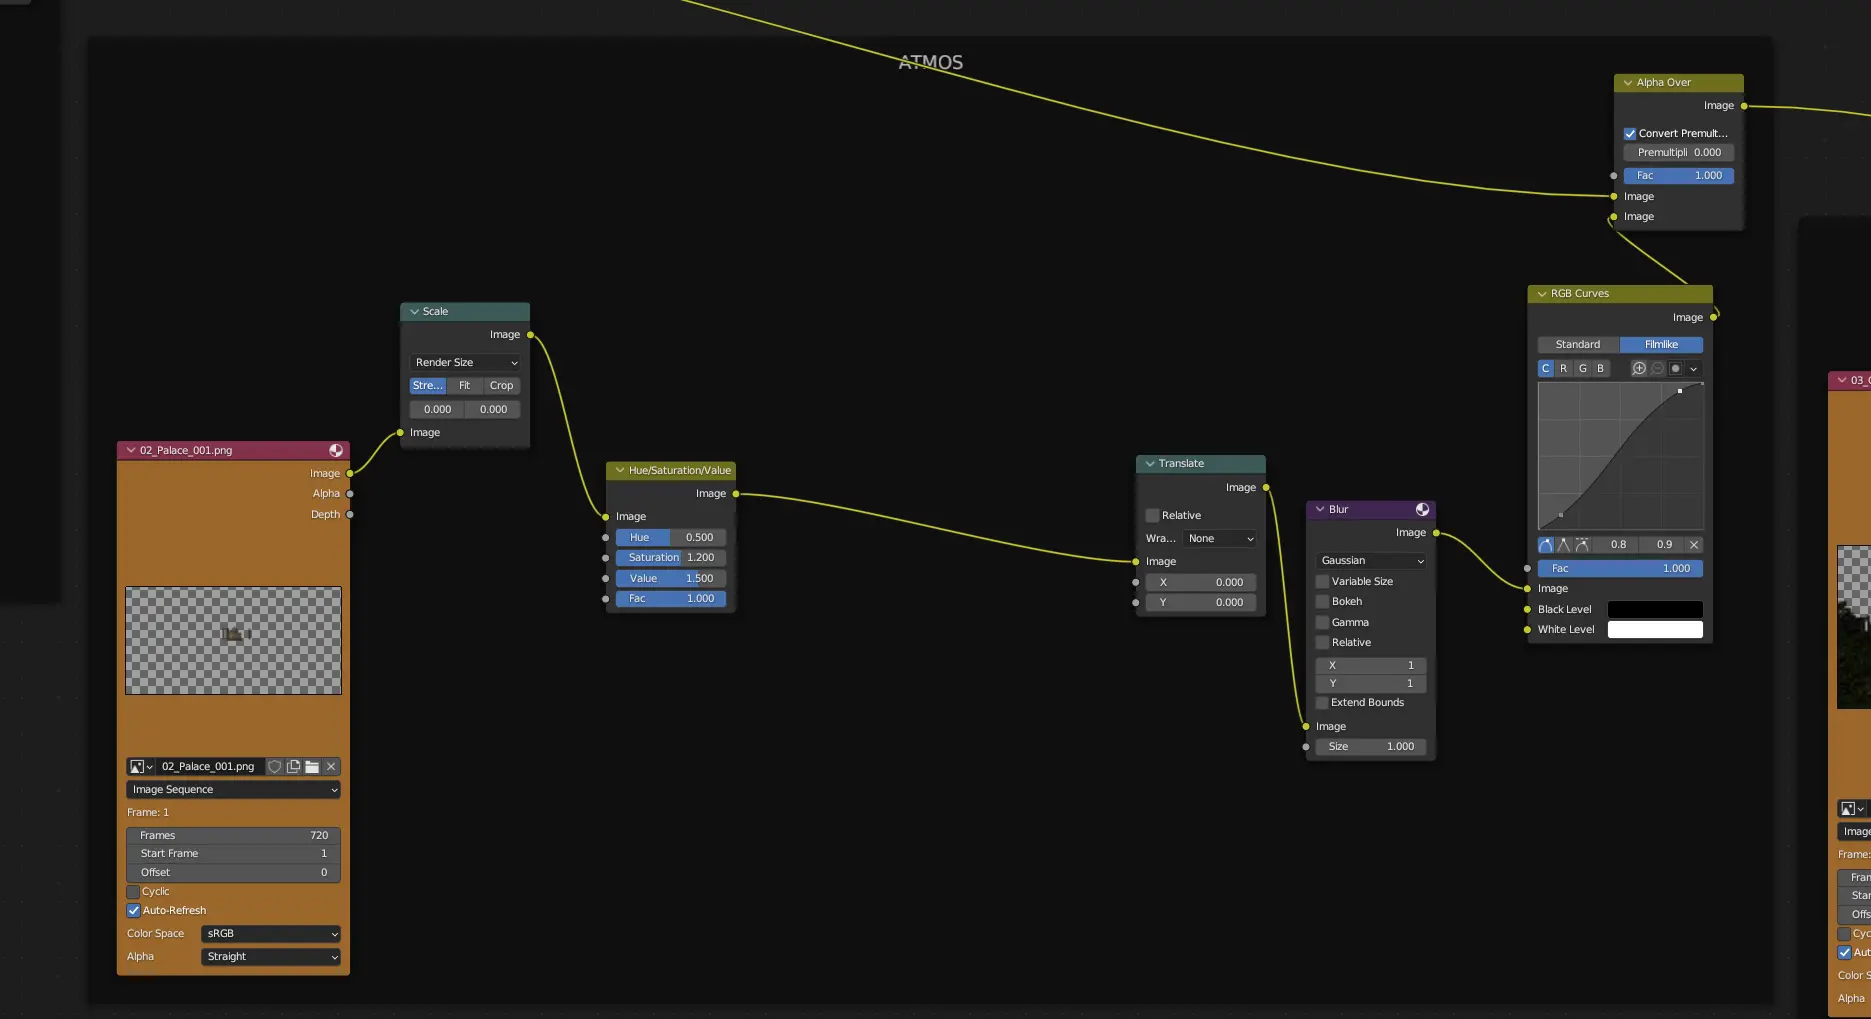
Compositing
This is not a tutorial on compositing but I left you here the config I’ve used to get this done. To get the video well composited, you have to connect layers in the right order, with alpha blend and some correction. The most important part here is to always rescale the layer to the render size. During the process we show that some of the layers where rendered at 50% and now it is time to put things in a larger scale again. Don’t ever do this if you have time enough or the client needs a perfect result, but for testing things and try outs I would recommend it.
Also be sure about the video exported and put it also in a 12 K resolution or less. Remember to keep the 2:1 ratio.
Here you have a terrific course on rendering landscape. In it you will find that everything is worked through layers. I encourage you to do it.
If you want to have a guru on this topics, please, follow Martin Klekner in youtube.
Here are some images of the compositing process.
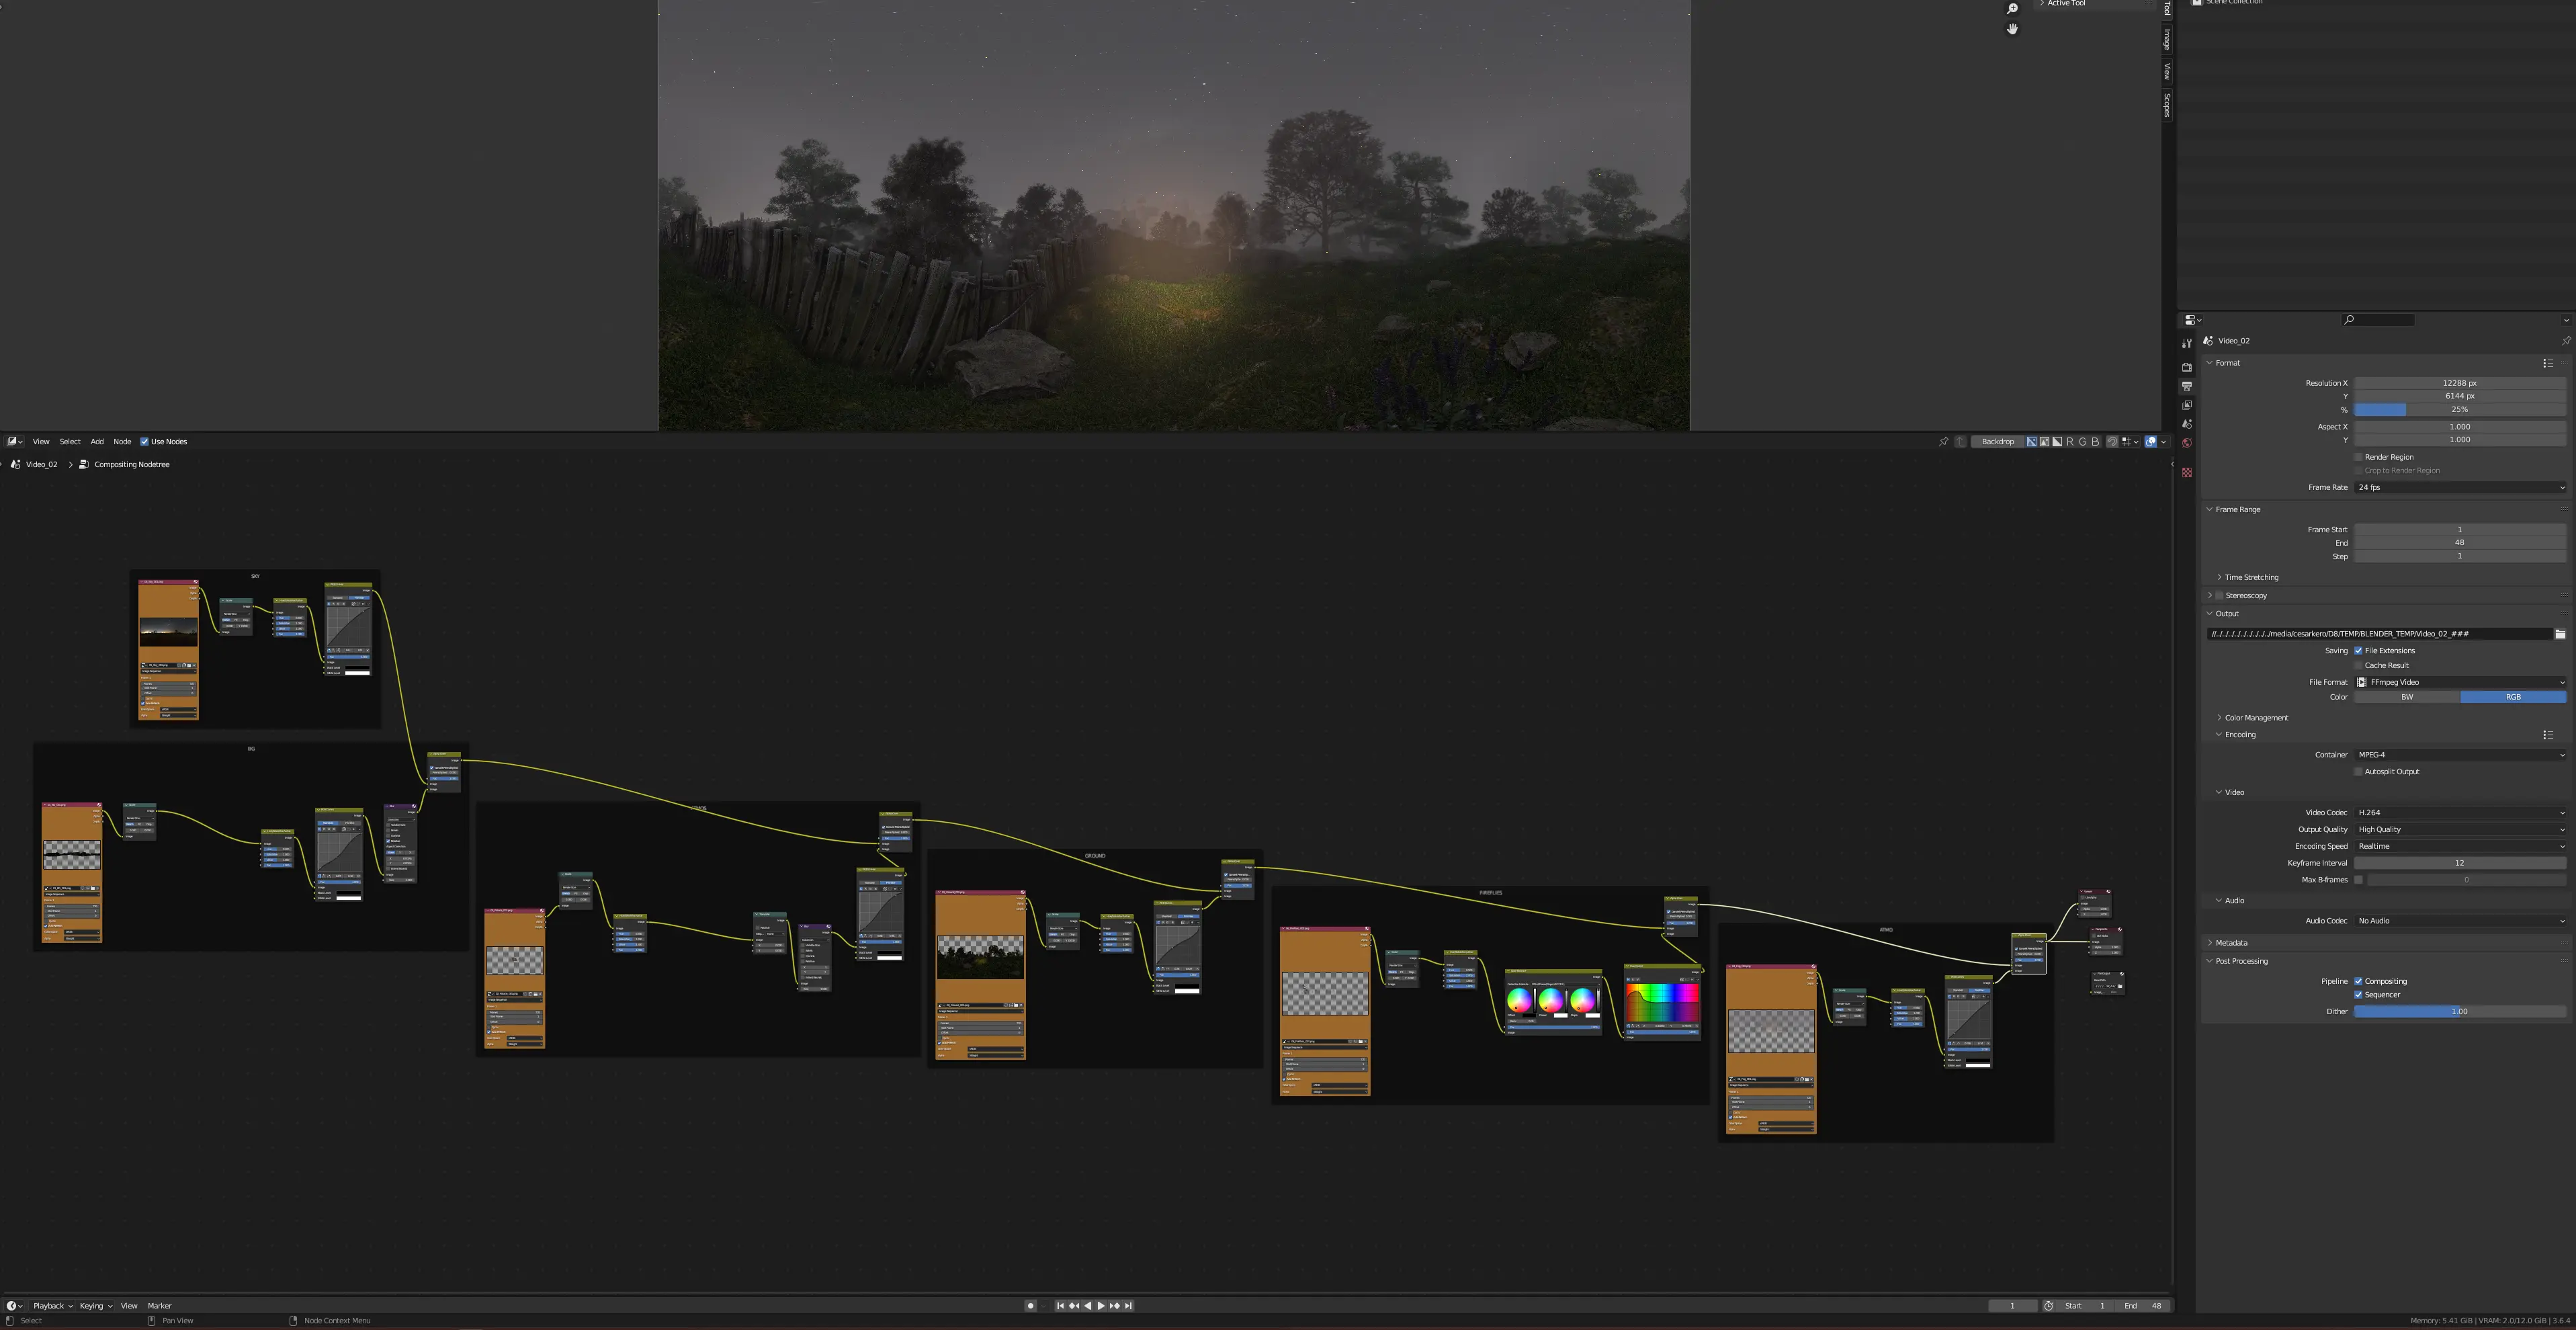
Full view of compositing

Sky
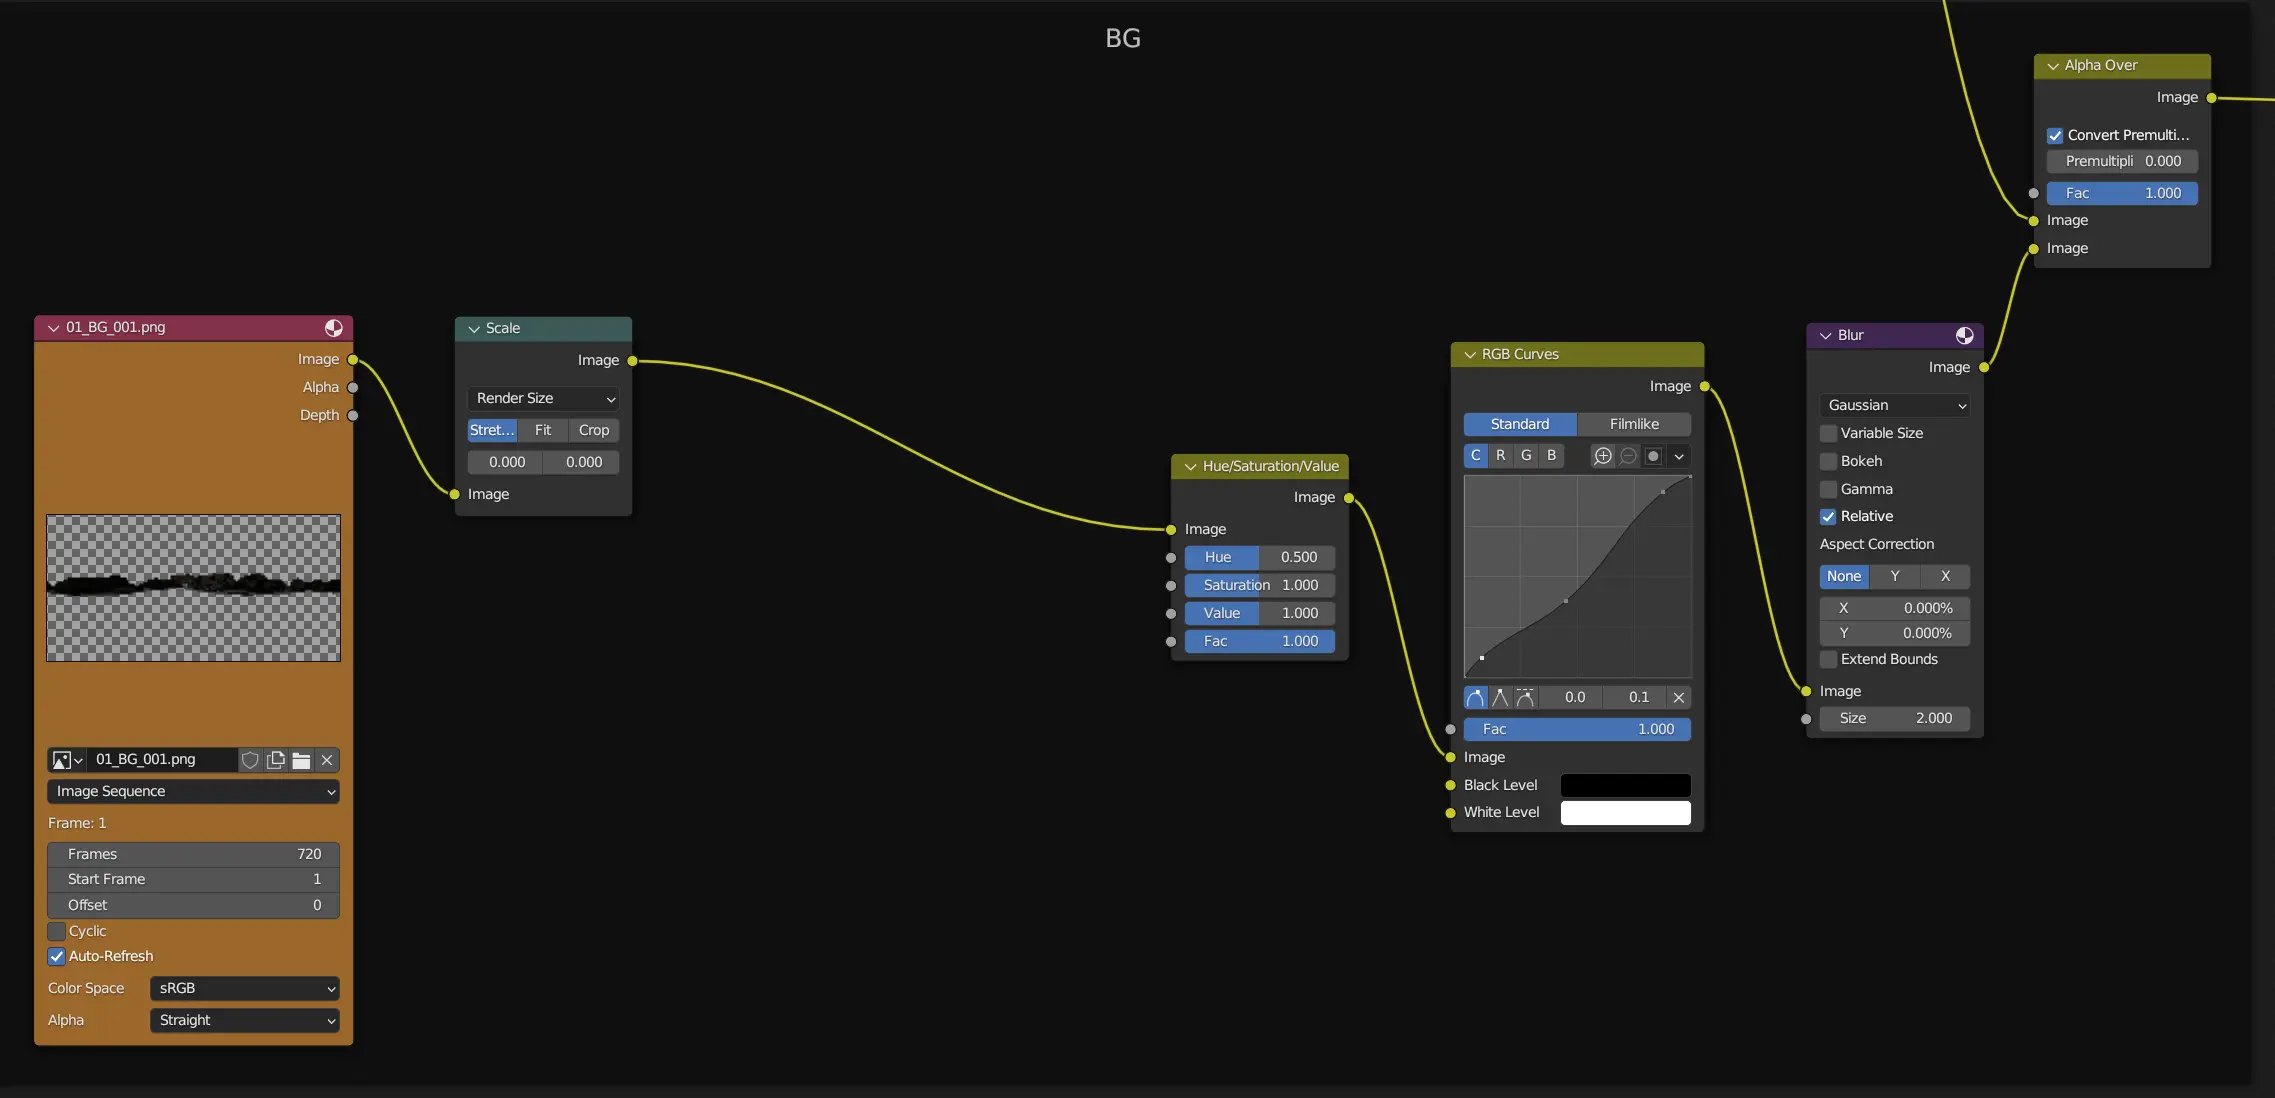
Background
Palace
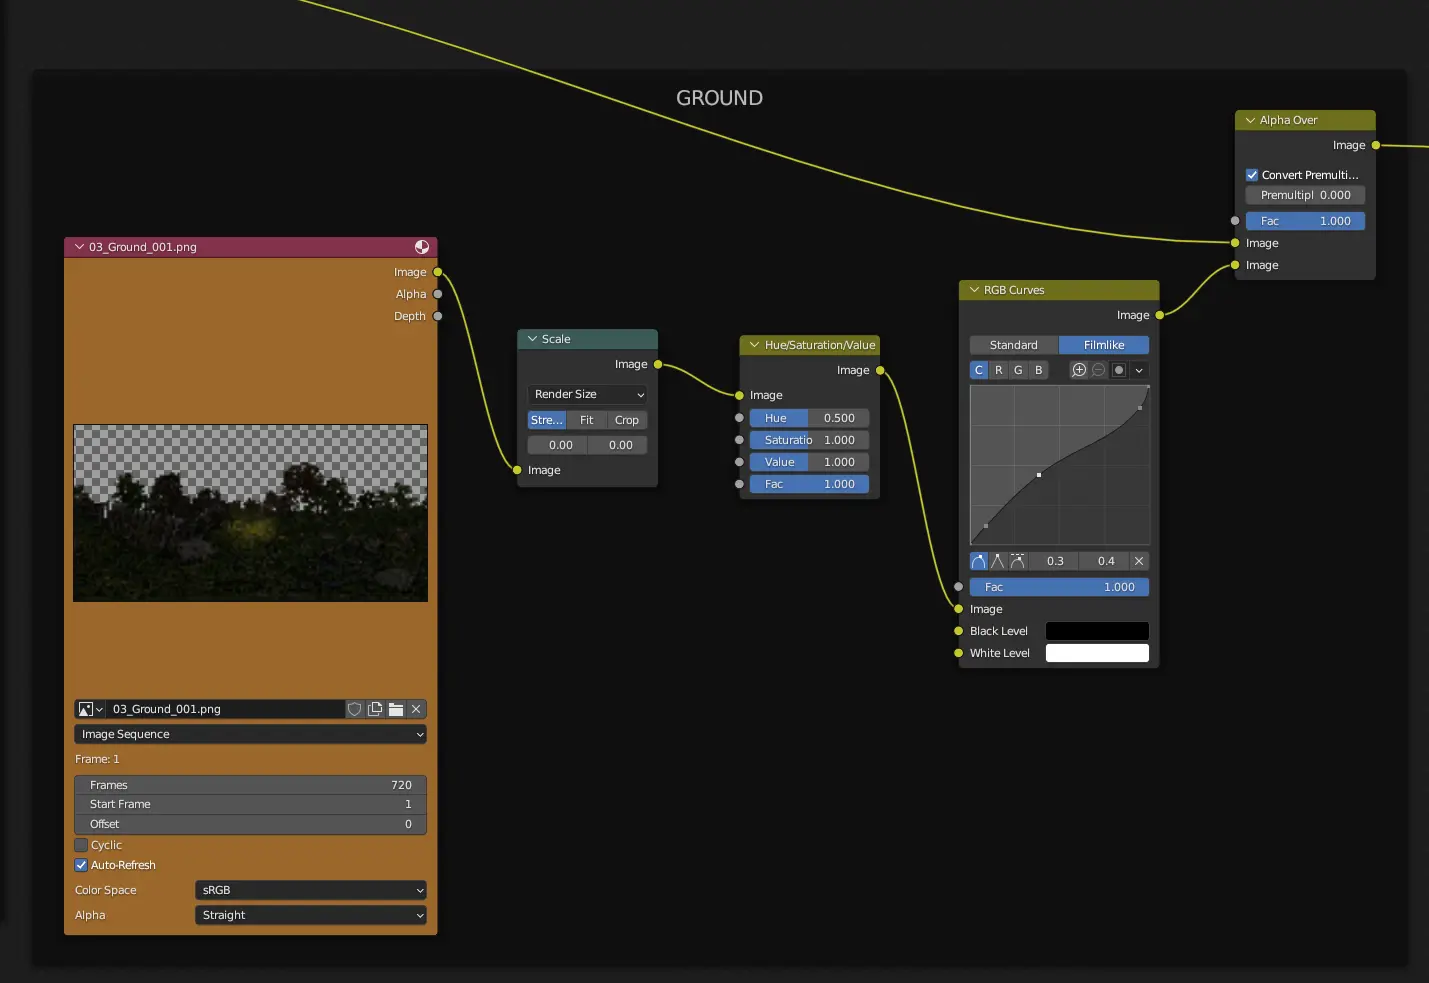
Ground
Fireflies
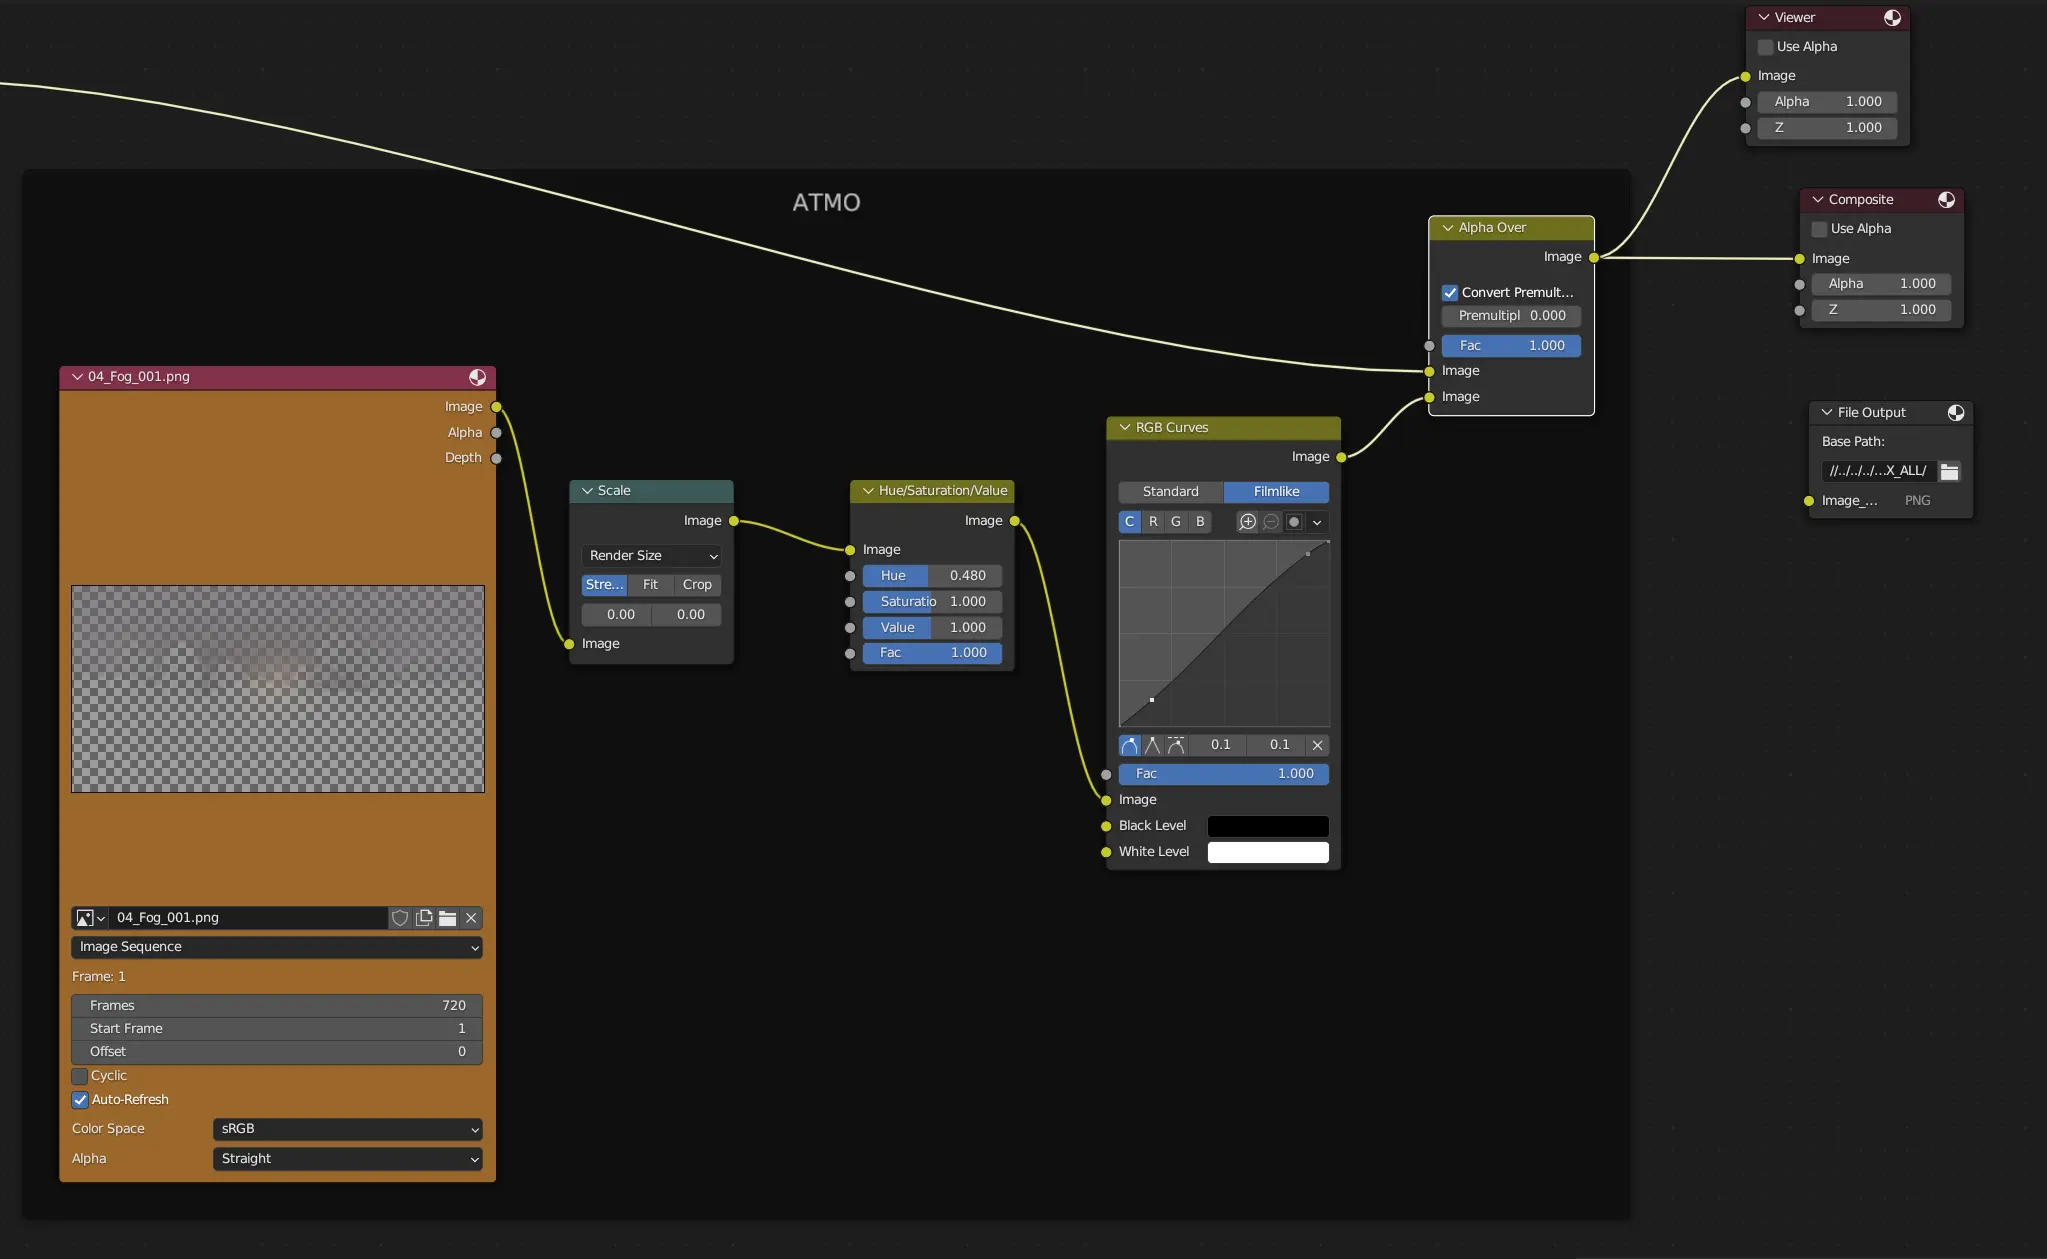
Fog
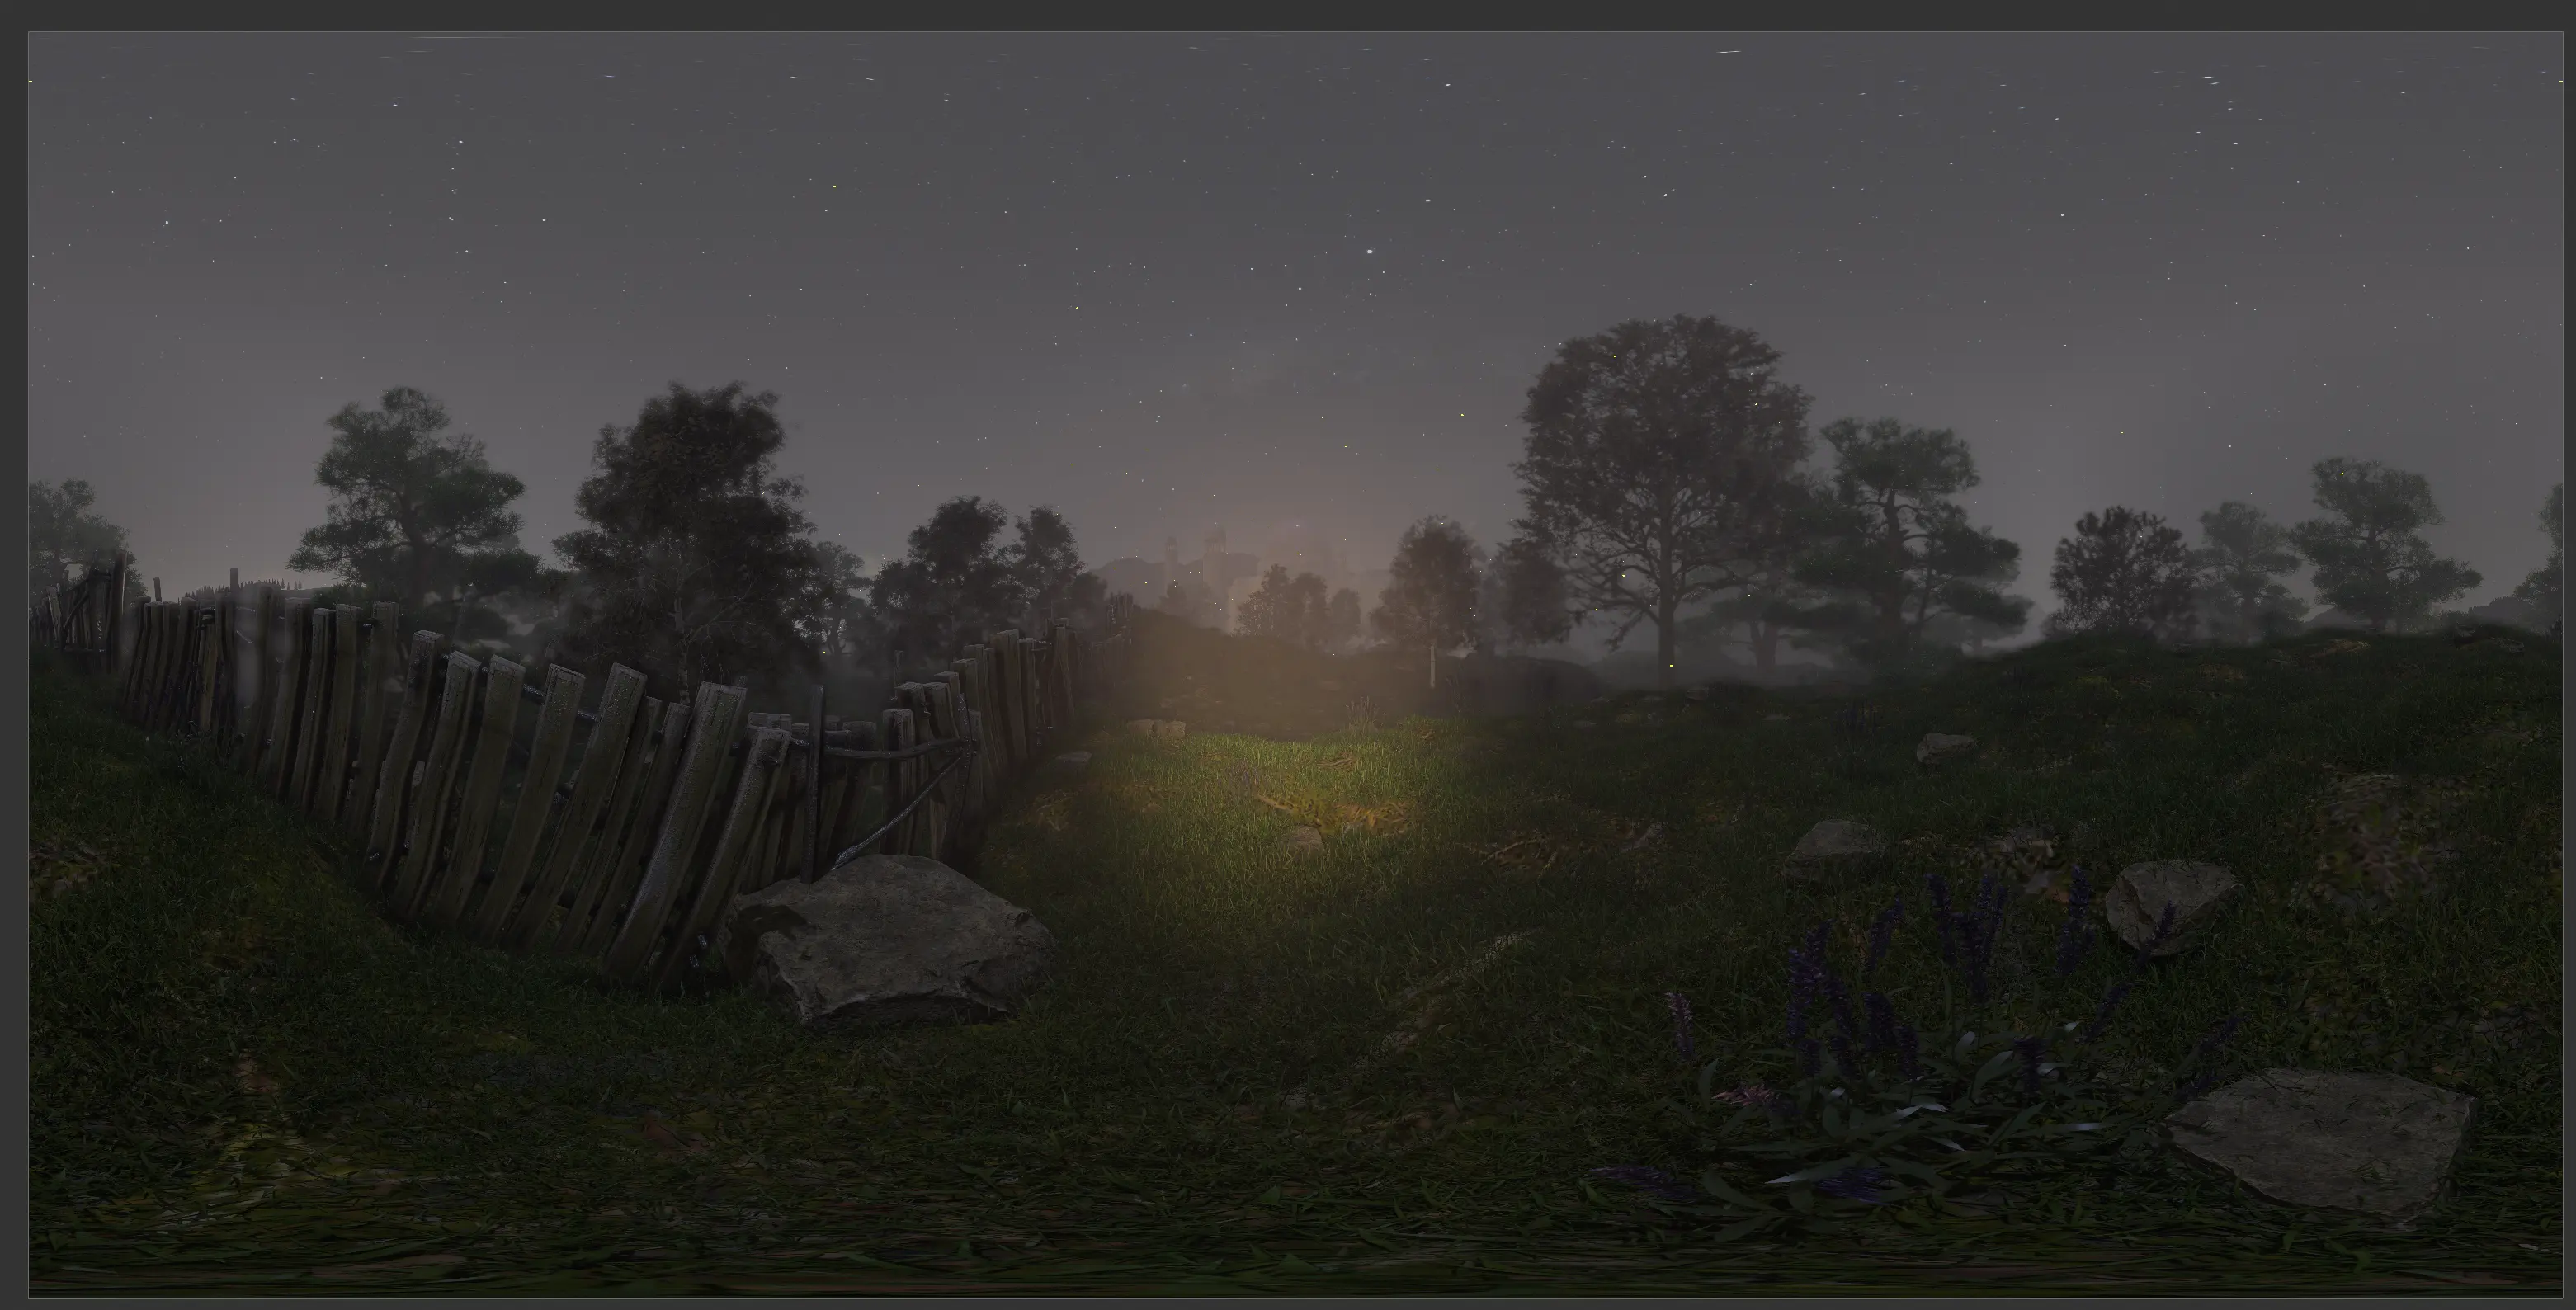
Final composition
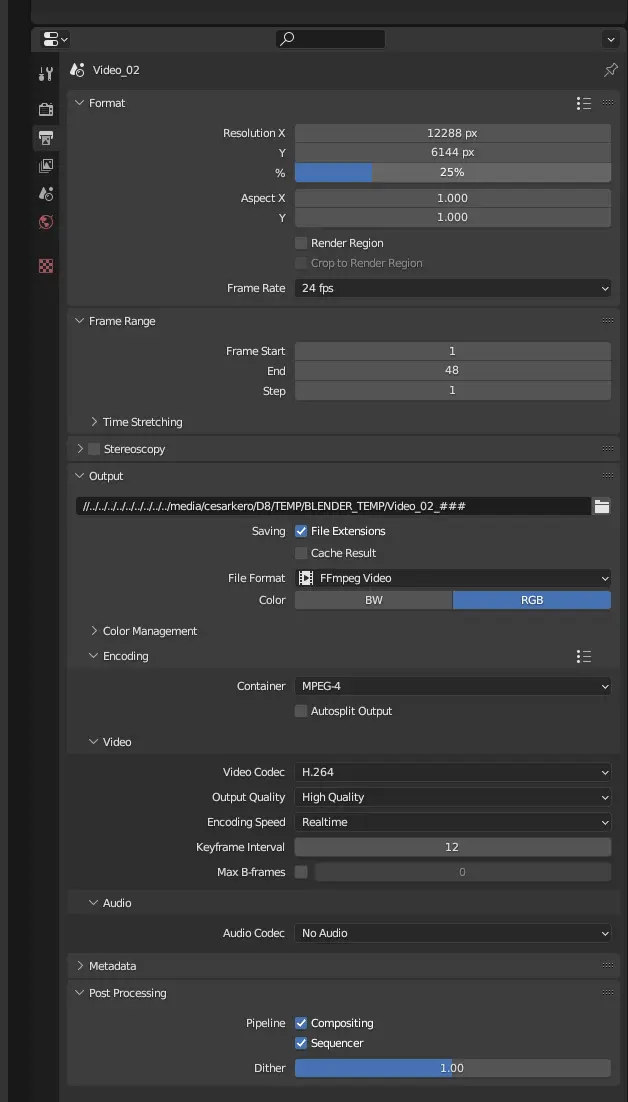
Parameters to export the equirectangular 360 video
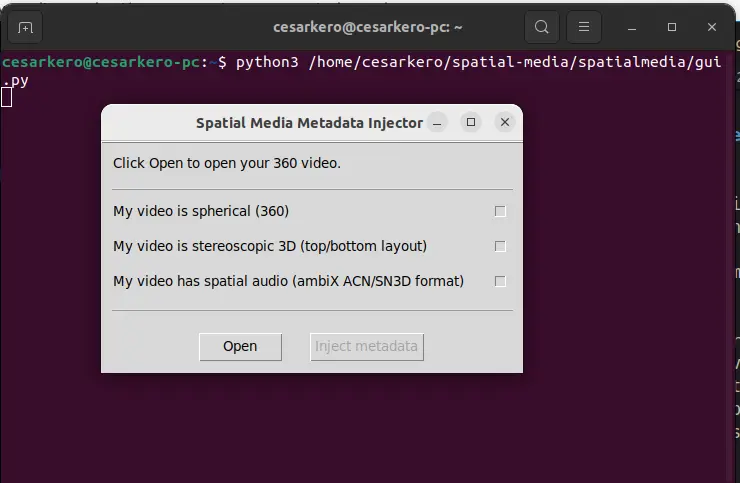
Injecting metadata
The rendered video output will not work by his own as a 360 video. You need to inject some metadata to get it working. Spatial Media is the tool I use to do son in Ubuntu 22.04.
To install it and execute it
# python3-tk is installed. python-tk is not installed.
git clone https://github.com/google/spatial-media
cd spatial-media/spatialmedia
python3 ./gui.py
And then, to use it I like to open the terminal from the folder where the video output is located and execute this. This will open the tool where you just need to Open the file (.mp4) and press Inject metadata. You can open the video and pan within it with VLC or do just like me and update it to youtube, where it should also work directly (detected as a 360 video).
To run it:
python3 /home/$USER/spatial-media/spatialmedia/gui.py
Conclusion - Ten Commandments of a Good Final Video Render
- You shall review that all frames have been rendered. (Possible inclusion in the video on how to quickly check).
- You shall read from one disk and write to another.
- If rendering above 8K h.264 is not the good one, but the best until now.
- You shall calculate the render time.
- You shall calculate the size of the rendered files.
- You shall review the scale of each layer in the composition.
- You shall bake animations.
- You shall select a temporary folder for garbage.
- You shall review the View Layer before pressing F12.
- You shall not render unnecessary details.
The tutorial
The whole process aims to get a 360 video rendered at 12K and you can check the full tutorial in this video.
I hope you can perceive the effort here, so please, feel free to share it, comment here or in the youtube comments and contact me if you need help with anything about rendering 360 landscapes.

