
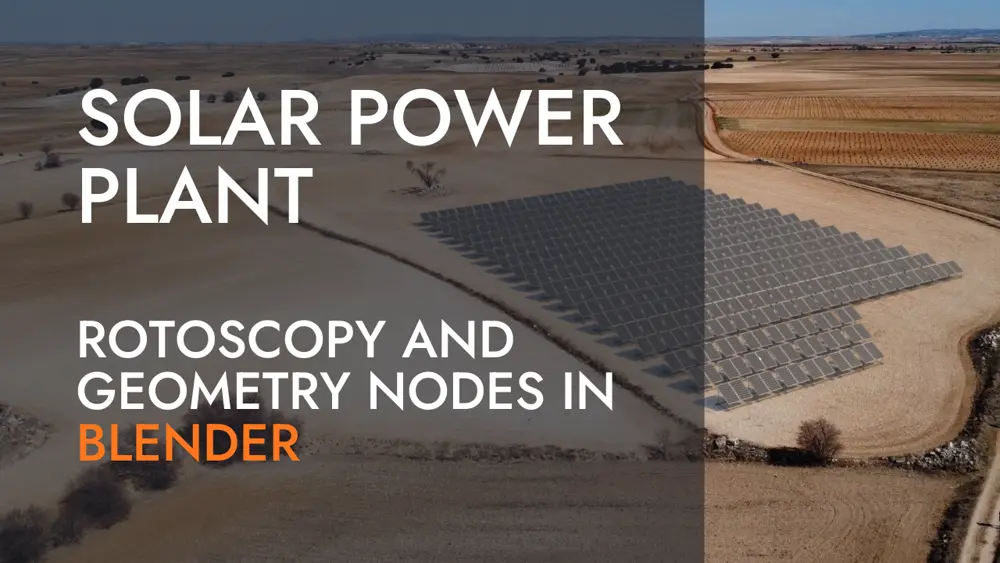
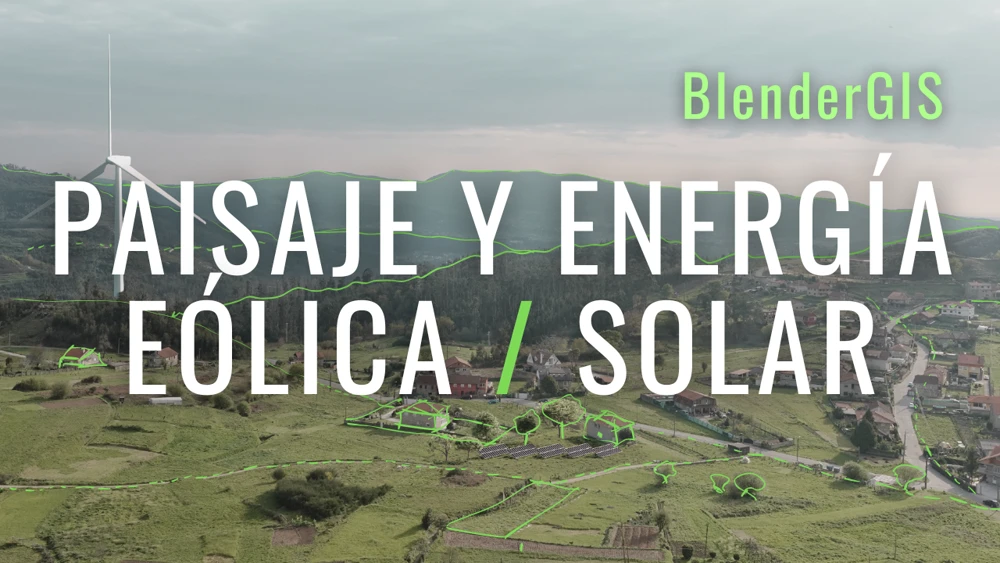
Realistic Solar Power Plant and Blender Motion Tracking
Renewable energy is becoming increasingly popular and necessary as we strive to reduce our reliance on fossil fuels. Solar power is one of the most promising forms of renewable energy, and as such, it's crucial dto be able to accurately represent solar power projects in visualizations and animations. Blender, a powerful 3D creation software, is an excellent tool for achieving realistic renders of solar power projects. Content:- The process:
- Step 1: Open Blender and add a new tab with Motion Tracking.
- Step 2: Import your footage
- Step 3: Add tracking points
- Step 4: Solve the camera motion
- Step 5: Select origin and floor points
- Step 6: Add the object or full project you want to render
- Step 7: Multiply objects using Geometry Nodes
- Step 8: Add shadows
- Step 9: Edit the world
- Step 10: Add extra objects
- Step 11: Render the video
- Step 12: Composite the final video
- The video
- Extra tip
- The conclusion
- The resources
In this tutorial, we’ll guide you through the process of creating a lifelike rendering of solar renewables power on a flat terrain using Blender’s motion tracking capabilities. From importing footage to editing shadows, we’ll cover all the steps necessary to create a stunning visualization of your solar power project. Whether you’re a beginner or an experienced Blender user, this tutorial is designed to help you achieve impressive and accurate results. So, let’s get started!
The process:
In this video, we will show you how to create a simple rendering on a flat terrain using Blender. This tutorial is not only intended to serve as an example of precise work but also to demonstrate how the tools within Blender are sufficient to establish the parameters of a moving camera, in this case, a DJI Mini 2, to render a project on video with the maximum resemblance to reality.
The summary of the process is as follows:
Step 1: Open Blender and add a new tab with Motion Tracking.
To begin, open Blender and create a new tab with Motion Tracking. This will enable you to track the motion of your camera as it moves through the scene. You can do this by clicking the “+” button at the top of the screen and selecting “Motion Tracking” from the drop-down menu.
Step 2: Import your footage
Next, import your footage into Blender by going to “File” > “Import” and selecting your video file. This will allow you to track the motion of your camera in relation to your footage.
Step 3: Add tracking points
Add tracking points either by hand or using automatic mode. To add points manually, select the footage in the Motion Tracking tab and click the “Add” button. You can then place the point where you want it in the footage. For automatic tracking, click the “Track” button and Blender will attempt to track the point for you.
Step 4: Solve the camera motion
Once you have added tracking points, solve the camera motion by clicking the “Solve Camera Motion” button. Aim to achieve an error of less than one pixel if possible. This will help ensure that your rendering is as realistic as possible. Here is the Camera Solving configuration I’ve used:
Blender Tracking
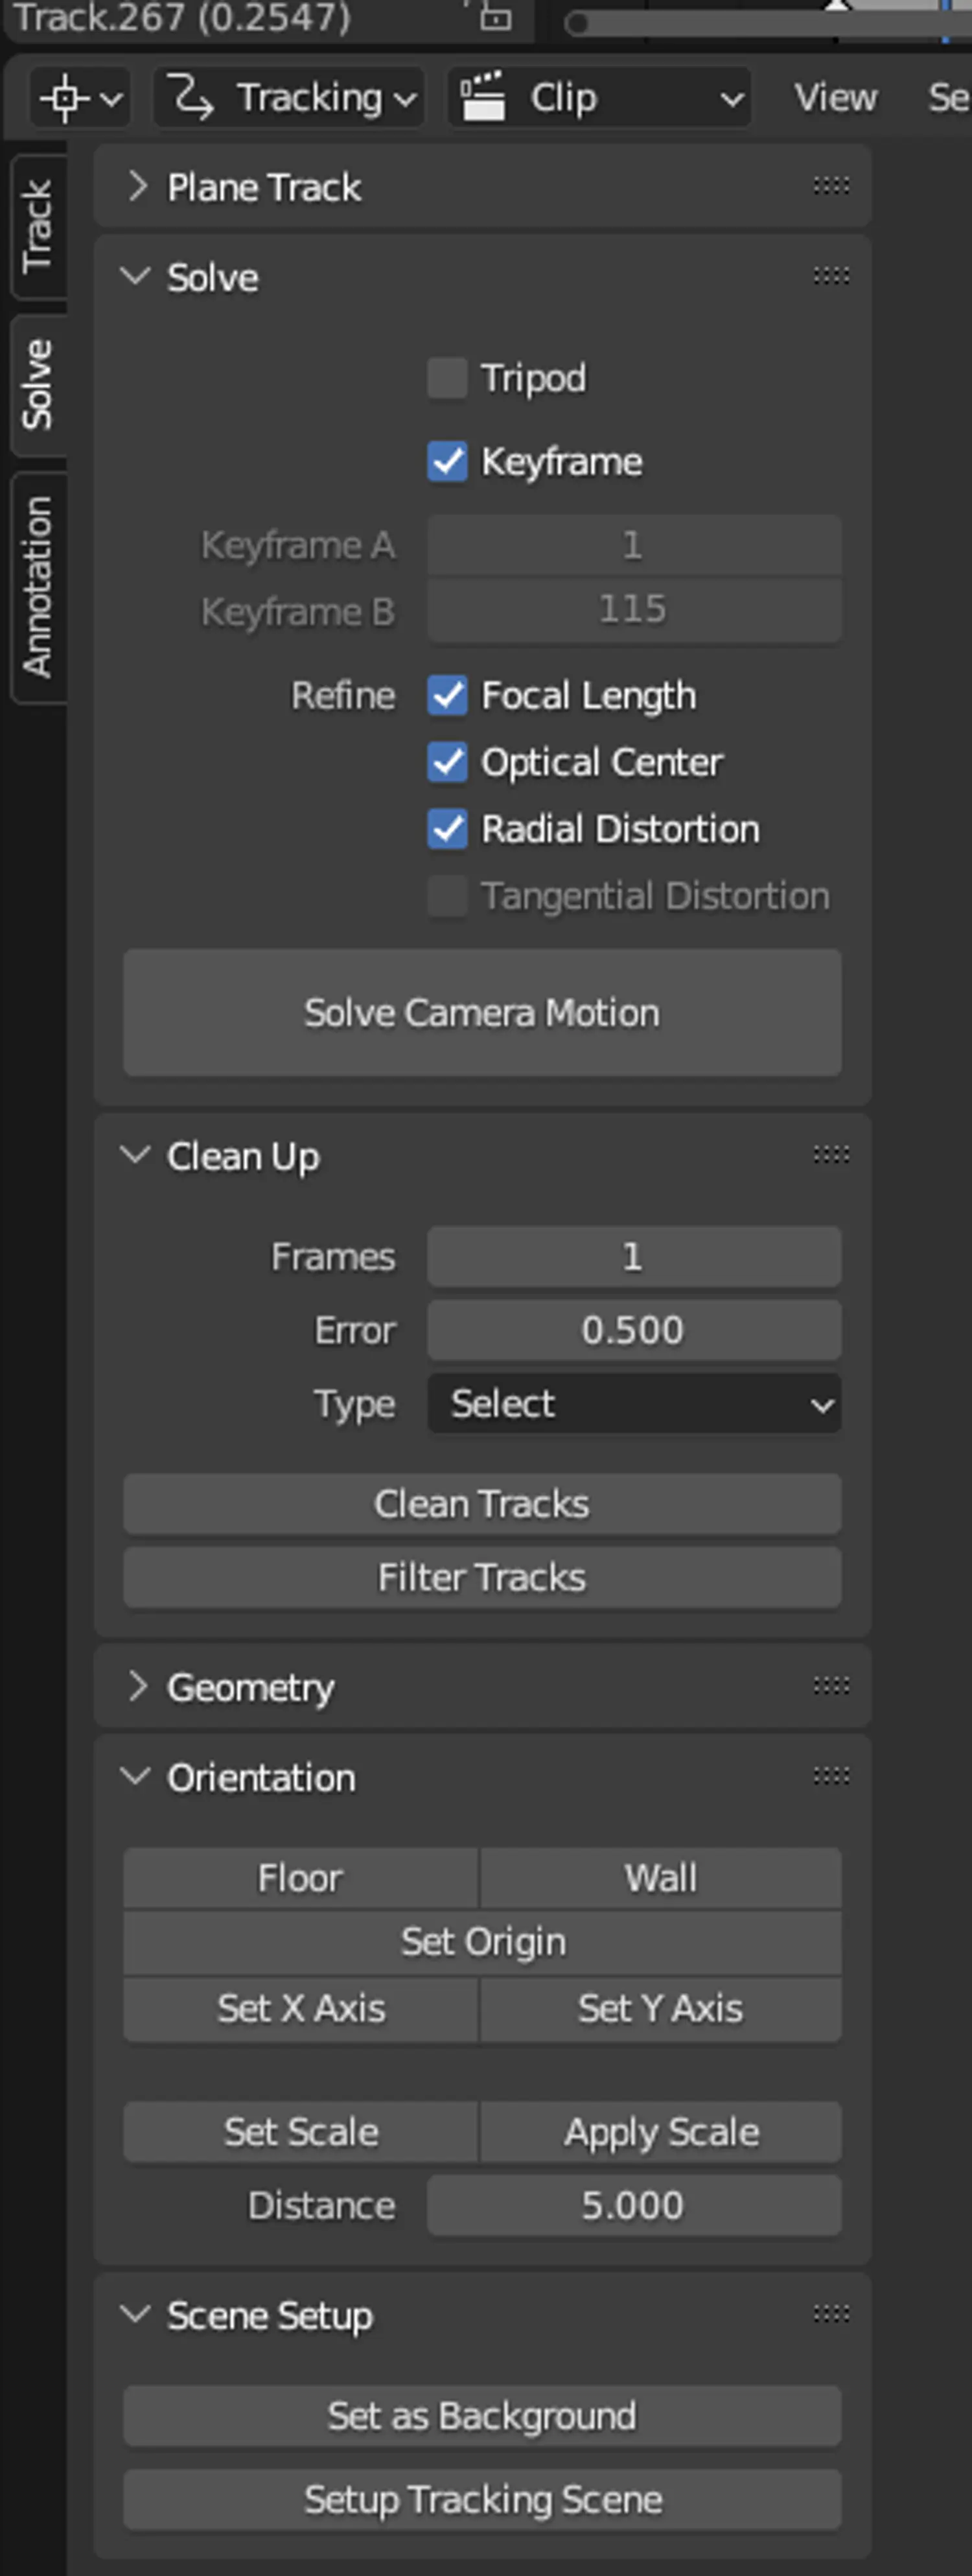
Blender Solving
Motion Tracking workspace
Step 5: Select origin and floor points
Select the points where you want your origin and floor by clicking the “Set Origin and Floor” button. This will establish a reference point for your rendering.
Step 6: Add the object or full project you want to render
Add the object or full project you want to render by selecting it from the “Add” menu. This could be a solar panel, a building, or a full solar power project.
Step 7: Multiply objects using Geometry Nodes
If you need to multiply these objects in a regular way, you can use Geometry Nodes over a simple layer. To do this, first create a new layer and subdivide it. Then add the instance (in this case, a solar panel) and add instances on points. Finally, render just the instances, not the layer.
Step 8: Add shadows
For shadows, duplicate the layer and set it to shadow catcher. This will allow you to capture the shadows cast by your objects.
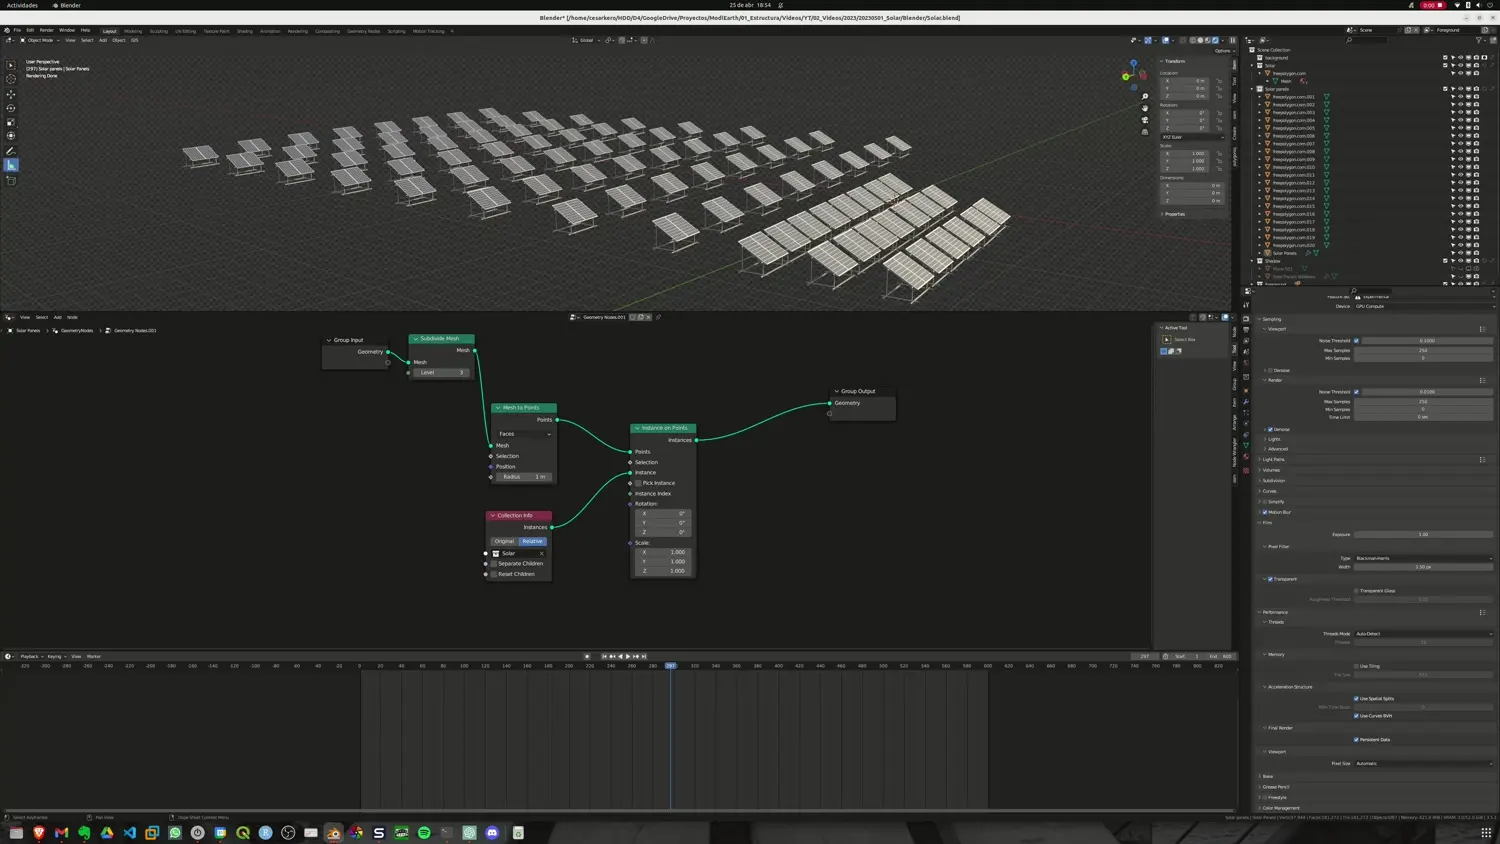
Blender Geometry Nodes
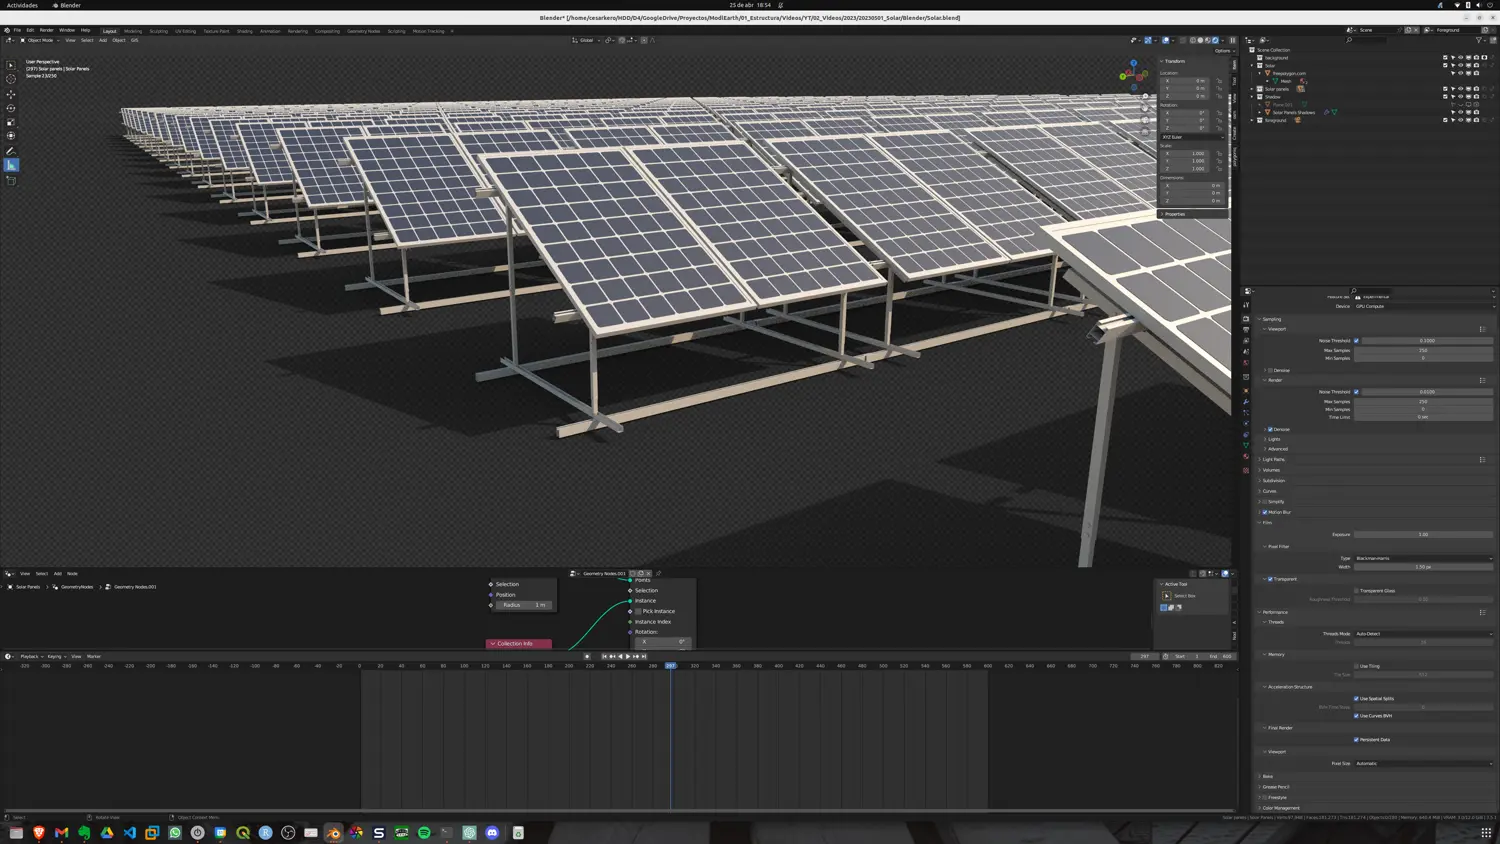
Blender Shadows
Step 9: Edit the world
Edit the world so the light is appropriate to the scene. You can do this by adjusting the lighting in the “World” tab. Blender offers different options for lighting, including a new feature called Nishita Sky, which allows you to simulate realistic sky and lighting conditions based on real-world data. To use Nishita Sky, simply select it from the “World” tab and adjust the settings to match your scene. This will help ensure that your rendering is as realistic as possible and that your solar power project is accurately represented.
Step 10: Add extra objects
Add extra objects such as vegetation to improve the render aspect. You can do this by selecting the object from the “Add” menu and placing it where you want it in the scene.
Step 11: Render the video
Once you have completed your scene, you can render the video directly using the nodes. However, to tweak colors and shadows, it’s recommended to render by layer and then composite the video. To do this, select the layers you want to render and click the “Render” button. Then, use the “Compositor” tab to adjust the colors and shadows as needed.
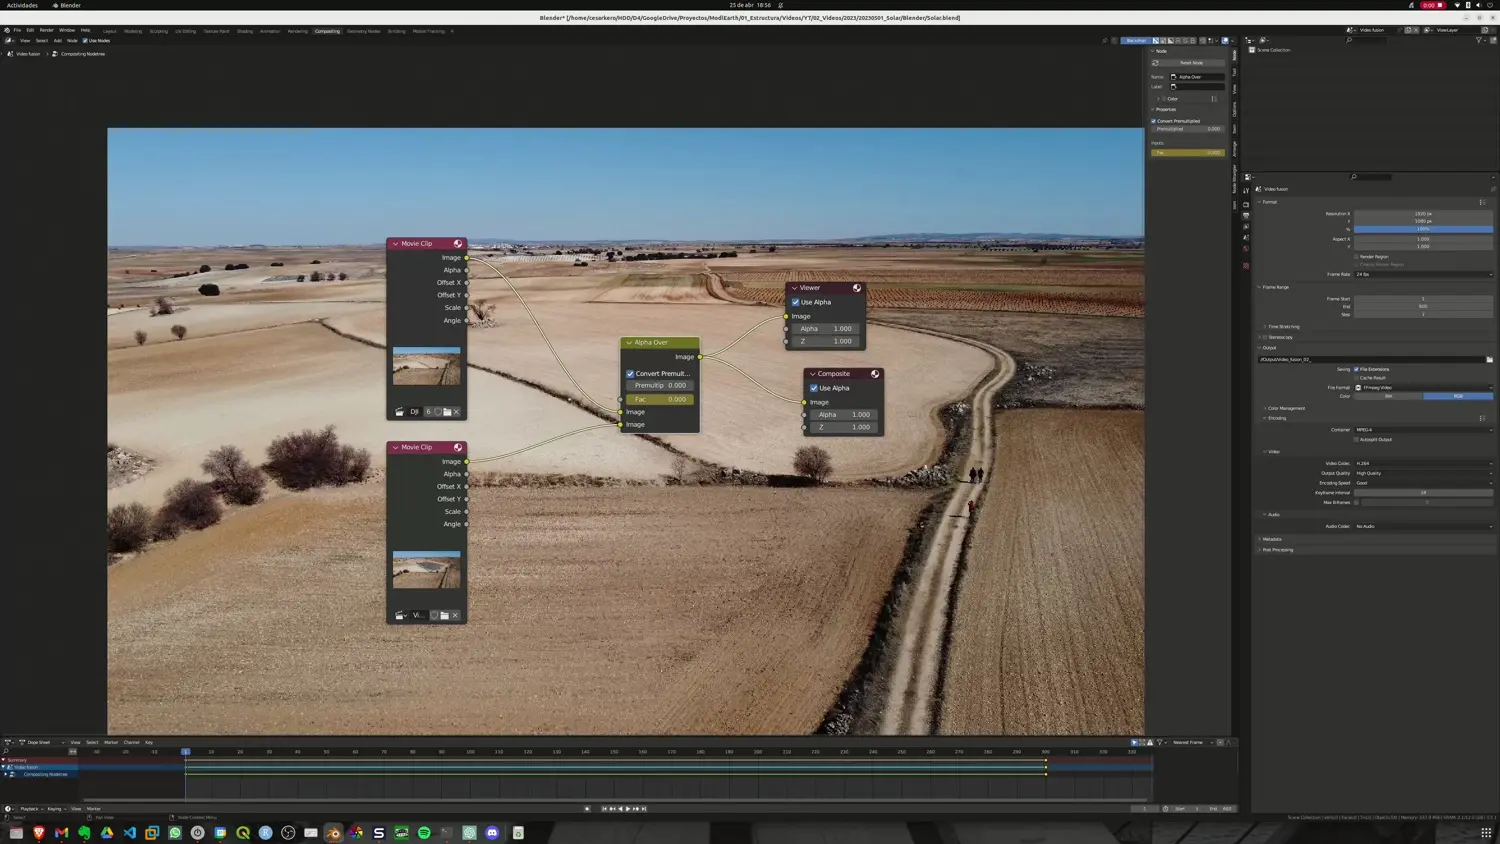
Step 12: Composite the final video
Once you have completed your rendering, it’s time to composite the final video. To do this, go to the “Compositor” tab and add your rendered footage, ambient occlusion (AO), and shadow layers. Use the “Alpha Over” node to combine the layers and the “RGB Curves” node to adjust the colors and brightness.
To combine the rendered footage with the ambient occlusion and shadow layers, first connect the output of the rendered footage to the top input of the Alpha Over node. Then, connect the output of the shadow layer to the bottom input of the Alpha Over node. Finally, connect the output of the AO layer to the second input of the RGB Curves node. Adjust the curves to achieve the desired color and brightness.
Once you’re happy with the compositing, you can render the final video by clicking the “Render” button. By following these steps, you can create a stunning and realistic rendering of your solar power project using Blender’s motion tracking capabilities and compositing tools.

Blender Compositing 01
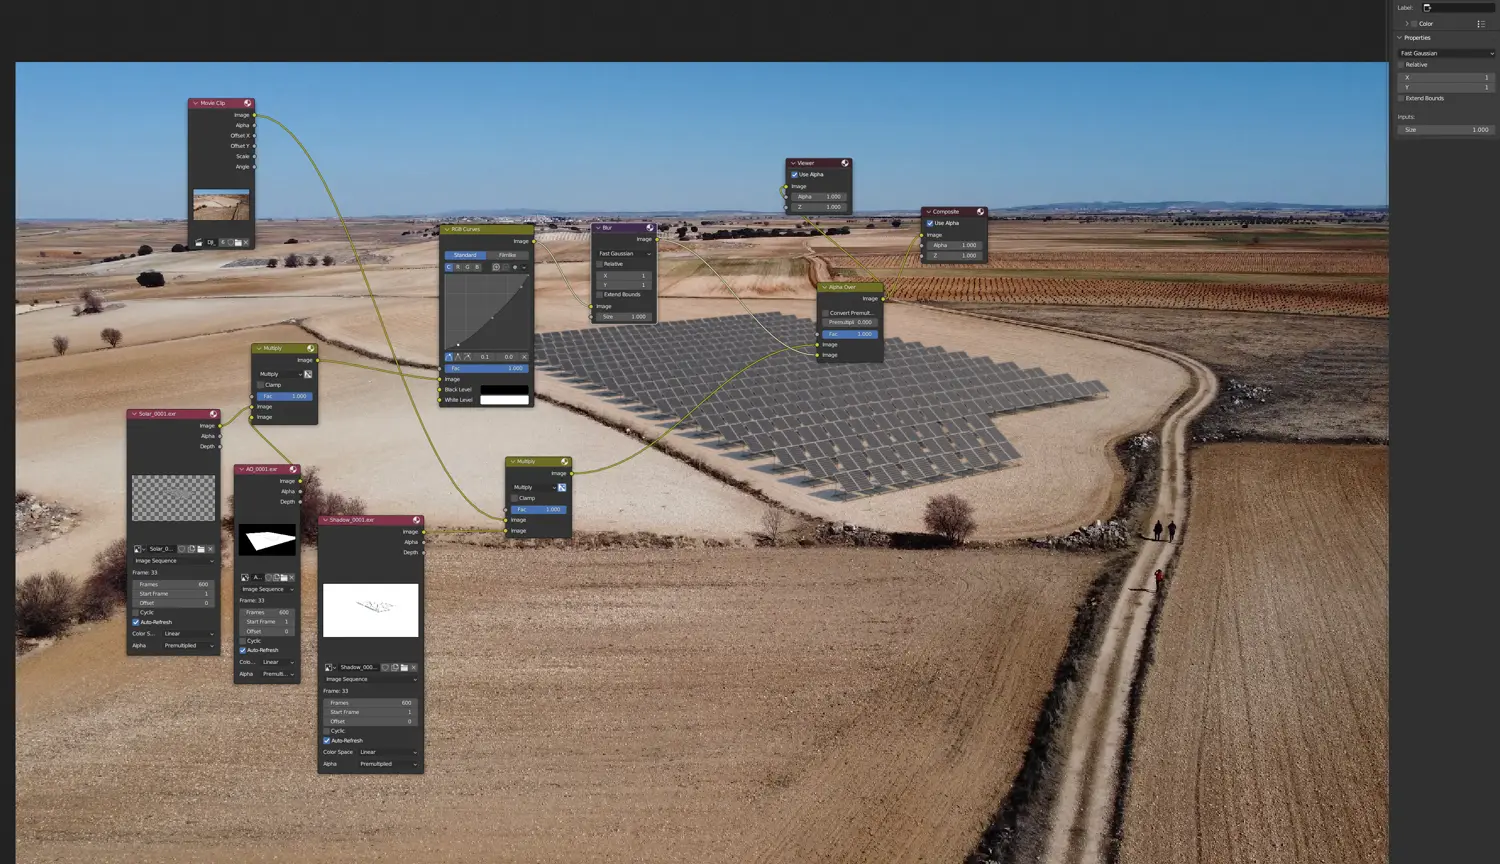
Blender Compositing 02
The video
Thank you for watching this tutorial on creating dynamic wind turbines with Blender. We hope you found it informative and valuable in your 3D modeling and visualization projects. By following the steps outlined in this tutorial, you can create realistic and visually compelling wind farm scenes to promote the benefits of renewable energy. Don’t forget to like and subscribe to our channel for more tutorials and tips on Blender and 3D modeling. Happy blending!
Extra tip
If you want to create a simple transition between your rendered video and you original one as the shown in the first part of the post, just mix both videos like this and add a keyframe with the alpha at the frame you want your project to show. As simple as that.
The conclusion
By following these steps, you can create a stunning and realistic rendering of your solar power project using Blender. Whether you’re a beginner or an experienced Blender user, this tutorial is designed to help you achieve impressive and accurate results.
In a new video compositor, you can adjust the curves so the solar panels look much better, adding a little blur to match the camera conditions. Otherwise, the render looks too crispy while the image has some grain.
Here’s a fast video of the process. If you’re interested, we could release a video explaining things in detail. By the way, we also did the video editing in Blender, including the simple drawing. We hope to improve our skills for future videos.
Thanks for watching and sharing!
The resources
I’ve got to tell you, this couldn’t have been achieved without these people. Check them out too!


